When it comes to transforming your laundry room into a practical yet aesthetically pleasing space, choosing the right color palette is paramount. While this often-overlooked room may not receive as much attention as a living room or kitchen, its functionality is equally important, making the need for a thoughtful approach to color selection even more critical. The right hues not only enhance the room’s visual appeal but also contribute significantly to your overall mood and the efficiency of your housework.
Before diving into color charts and samples, consider the style and ambiance you wish to establish. Are you aiming for a bright and airy feel or a more cozy and intimate atmosphere? The answer to this question will guide your overall palette choice, ensuring that your laundry room meets your design visions and practical needs.
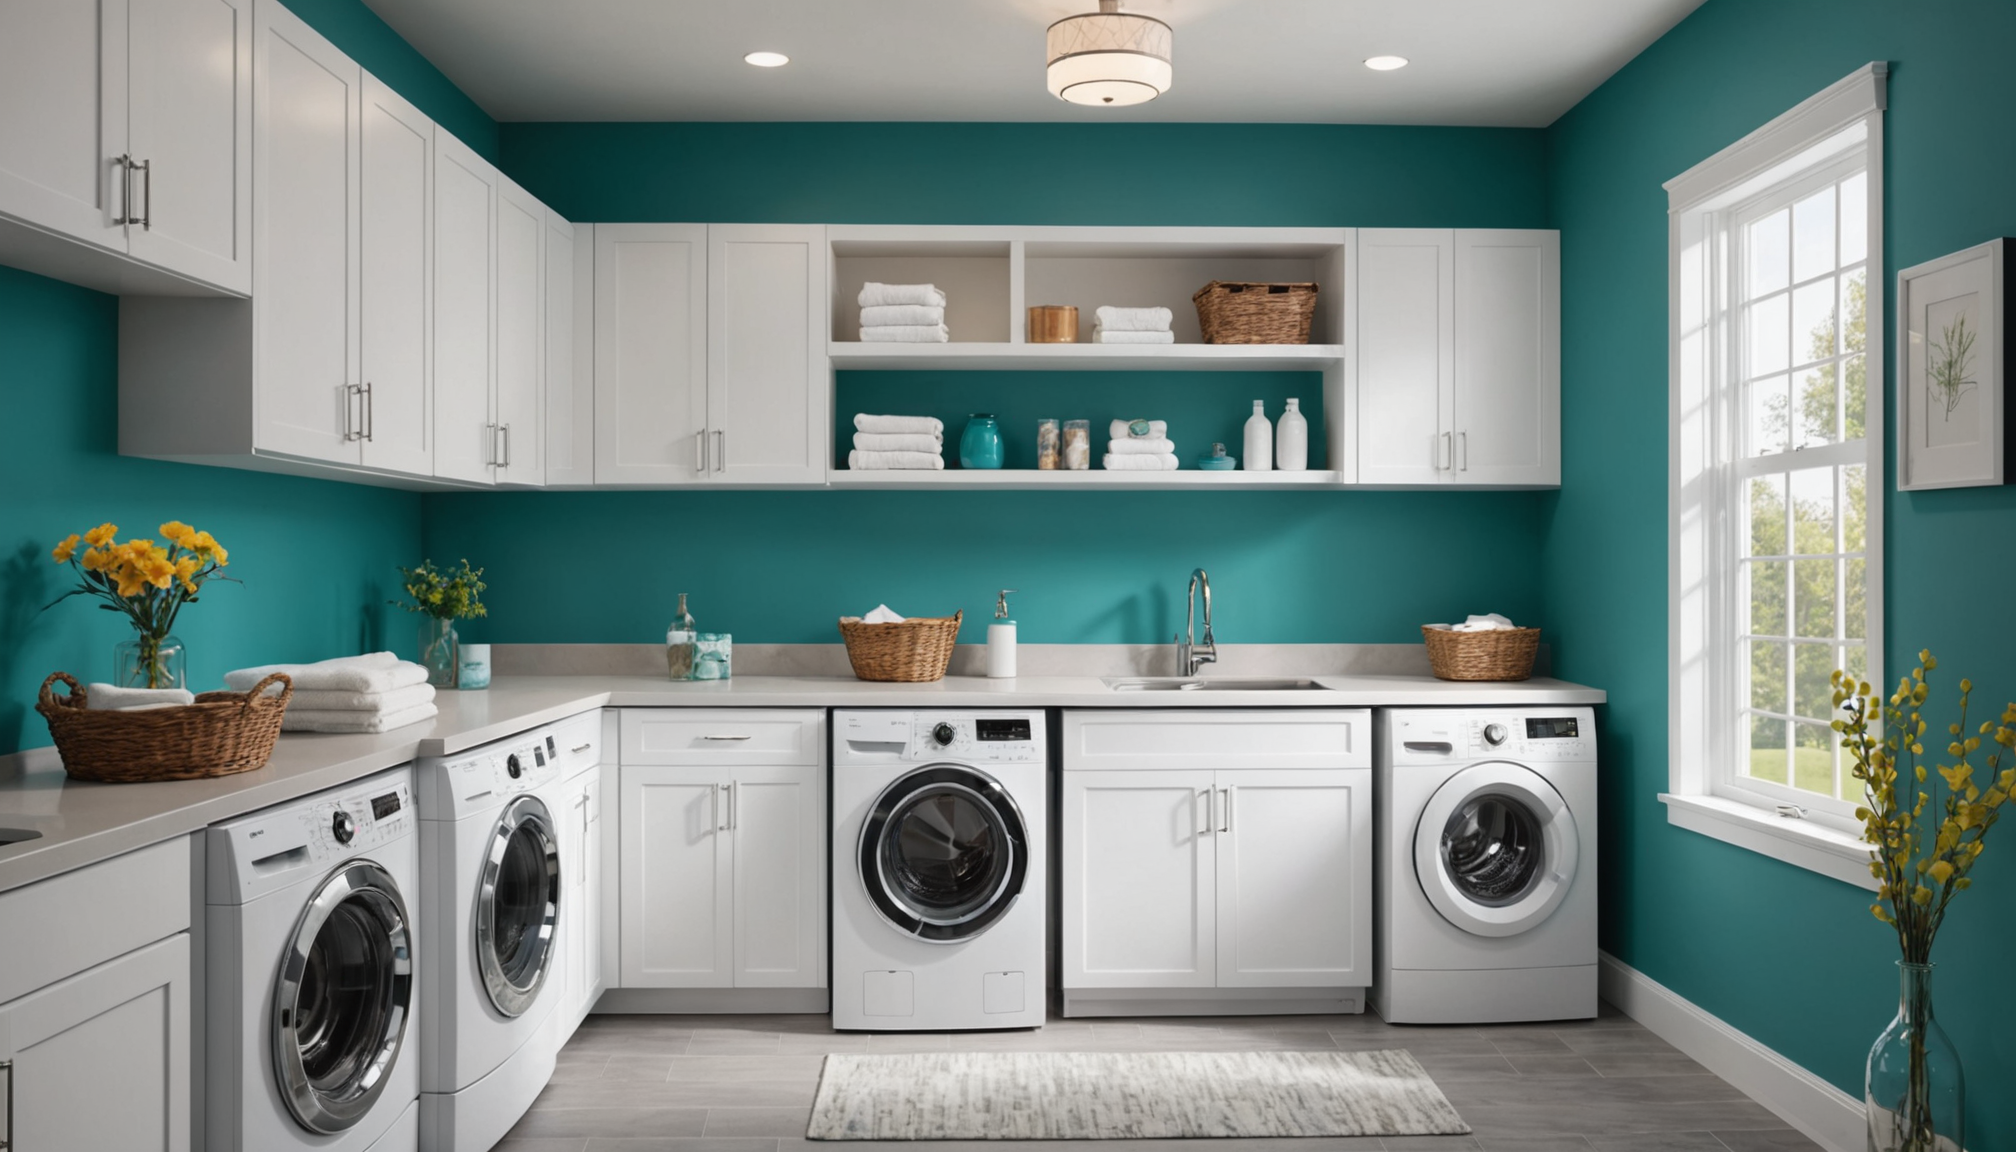
For those who favor a modern and sleek look, muted neutrals such as soft grays and whites can lend a sense of clean sophistication and spaciousness, which is handy in small or dimly lit areas. Incorporating splashes of vibrant hues—like a bold teal or a sunny yellow—on cabinetry or accent walls can inject energy and break the monotony, making tasks feel less mundane.
On the other hand, tailored combinations can align your laundry room with other spaces in your house, such as a connecting garage or mudroom, to maintain a cohesive flow throughout your home. Consider creating a consistent theme by using colors that complement or resonate with adjacent areas, enhancing your house’s overall smart home connectivity.
- Warm Neutrals: Options such as beige, cream, and taupe can render a warm and welcoming atmosphere, ideal for rooms furnished in traditional or rustic styles.
- Cool Tones: Blues, greens, and lilacs are calming shades that can transform a hectic laundry day into a more serene experience.
- Bold Contrasts: Deep navy, charcoal, or even a striking emerald can provide dramatic elegance, often working well as accent colors or on furniture pieces.
Here is a helpful table to compare different color mood associations and suitable scenarios for each choice:
| Color Type | Mood Association | Best Scenario |
| Warm Neutrals | Inviting, Cozy | Traditional or Rustic Style |
| Cool Tones | Relaxing, Refreshing | Modern or Refreshing Makeover |
| Bold Contrasts | Dramatic, Elegant | Accent Features or Modern Style |
Selecting the right color palette for your laundry room involves more than simply picking attractive shades. It’s about creating harmony within the space and ensuring that the room feels consistent with your home’s overall style while enhancing the effectiveness of your daily routines. Always sample colors in your space and observe them under various lighting conditions to make informed decisions that you’ll be pleased with for years to come.
Essential tools and materials needed
 To ensure a seamless and efficient painting process, gathering the correct tools and materials is crucial. Not only will this help you achieve a professional finish, but it will also save you time and effort throughout the project. Here’s a comprehensive list of everything you’ll need before you start painting your laundry room:
- Paint and Primer:
- Select high-quality paint suitable for the walls and surfaces in your laundry room. Opt for moisture-resistant options, especially for rooms prone to humidity.
- A primer is essential if you’re painting over a dark color or a previously stained surface; look for a primer that offers stain-blocking capabilities.
- Brushes and Rollers:
- Invest in a variety of brushes for cutting in edges and corners. A good angled brush can help make clean lines where the wall meets the ceiling or trim.
- Rollers with various nap sizes are essential depending on the texture of your walls. Smooth surfaces require a different roller than textured walls found in some laundry rooms.
- Painters’ Tape:
- Use this to protect trims, baseboards, and edges of ceilings to ensure clean, sharp lines without unwanted drips.
- Drop Cloths:
- Protect your flooring and any furniture in the room with a durable canvas or plastic drop cloth.
- Extension Pole:
- This tool is helpful for reaching high walls or ceilings, providing smooth application without needing a ladder.
- Paint Tray and Liners:
- Reusable paint trays equipped with liners will allow for easy cleanup and quick color changes if necessary.
- Sandpaper or Sanding Blocks:
- Smoothing out any rough spots or previous paint drips will enhance the final appearance of the walls.
- Clean Rags and Sponges:
- Keep these handy for wiping any spills immediately and ensuring the surface is clean before you start painting.
- Ladder:
- An appropriate ladder will be necessary for reaching the top corners and ceilings safely.
- Protective Gear:
- Don’t forget goggles, a mask, and gloves to protect yourself from fumes and splatters.
With your toolkit prepared, you’ll be equipped to tackle your laundry room makeover efficiently and effectively. Having these materials on hand ensures a streamlined process and a polished, modern result that enhances the utility and aesthetic of an often-underappreciated space. Remember, investing in good-quality tools not only contributes to the immediate success of your project but also serves as valuable assets for future home improvements throughout your smart home.
Preparing your laundry room for painting
Before you pick up a brush or stir your paint, dedicating some time to preparing your laundry room will lay the groundwork for a successful makeover. Proper preparation can significantly impact the efficiency of the painting process and the overall outcome, ensuring your laundry room not only looks pristine but is also resilient to daily use.
Begin by removing everything that might obstruct your work. Clear out detergents, laundry baskets, and small appliances. This initial step not only protects your items from paint splatters but also offers an unobstructed workspace. Larger items, like washing machines and dryers, should ideally be moved to the center of the room and covered with drop cloths. Use this opportunity to vacuum behind and underneath these appliances, as dust and lint accumulation is common in such areas.
Next, examine the surfaces you’ll be painting. Dust and grime can prevent paint from adhering properly, leading to uneven coverage and chipping down the line. Clean the walls, trim, and any cabinetry with a mild detergent or a water-and-vinegar solution to remove accumulated dirt. Pay special attention to areas prone to higher moisture levels or splashes, as these spots might have soap residue or mildew.
Once everything is clean, it’s time to focus on repairing any imperfections. Inspect your walls and surfaces for cracks, holes, or dents. Use a spackling compound to fill in these areas, and once it’s dry, sand the surface down to ensure it’s smooth and level with the surrounding wall. This attention to detail will result in a smooth, even paint application and enhance the room’s sleek, modern look.
Now, safeguard areas that won’t be painted. Use painter’s tape to cover edges of trim, door handles, and light switches. Applying tape properly will help in creating crisp lines and preventing undesirable paint runs. Don’t forget to lay drop cloths on the floor to protect from drips and spills, especially if you’re dealing with large areas in a smart home that might integrate with other living spaces, like a connecting garage.
Finally, ensure you have ample ventilation when you begin painting. Although modern paints are generally low in volatile organic compounds (VOCs), it’s still wise to open windows and use fans to disperse any fumes, improving air quality and accelerating drying time.
By meticulously preparing your laundry room, you’re setting the stage for a successful transformation that adds value and modern elegance to one of the most utilitarian spaces in your home. Ensuring a clean and organized approach aligns perfectly with any smart home ethos of efficiency and style.
Step-by-step painting process
Now that your laundry room is prepped and ready, it’s time to dive into the painting process, an exciting step where you will see your vision come to life. With your chosen color palette, tools, and materials at hand, let’s embark on this transformation journey.
Start by mixing your paint thoroughly to ensure consistency in color and texture. Stirring the paint vigorously will help blend any settled pigments back into the liquid, providing a smooth application every time.
Begin with the ceiling if you’re planning to refresh it, as paint splatters from above could potentially damage fresh wall paint. Use a roller attached to an extension pole for an even coat, moving in an overlapping W pattern to avoid streaks and ensure thorough coverage. The key is to keep a wet edge while you work, which helps in seamlessly blending sections without visible lines.
Once the ceiling is complete, focus on edging around windows, doors, and baseboards. This is where your angled brush will become your best friend. Dip the brush only halfway into the paint to avoid drips and maintain control as you carefully cut along the edges. A steady hand will provide clean lines and prevent paint from bleeding onto areas you want to keep pristine.
When it’s time to tackle the walls, use your roller to cover larger surfaces efficiently. Again, utilize the W pattern technique, ensuring you’re spreading the paint evenly and maintaining a wet edge. Work your way down from the top to the bottom, which minimizes the chance of dripping and allows for a more polished finish. Remember, multiple thin coats are preferable to a single thick one, allowing each layer sufficient drying time before applying the next.
As you work, maintain a strategic approach by handling one section at a time, especially if your laundry room connects to adjoining spaces like a garage. A methodical process will keep the area manageable and prevent mistakes in paint coverage or color consistency.
After painting, allow the last coat to dry thoroughly, which may require waiting overnight. Once dry, assess the walls and other painted surfaces for any necessary touch-ups. Lightly sand any drips or blemishes, then carefully apply additional paint with a small brush to these spots.
It’s crucial to keep in mind that your modern laundry room’s final look will be a testament to the effort you’ve put into its transformation. By following these detailed steps, you’ll ensure a professional quality finish that aligns with the sophisticated aesthetics of a smart home. This meticulous process not only enhances the room’s beauty but also its functionality, crafting a space you can take pride in.
Finishing touches and maintenance tips
Once the paint is dry and the walls boast a fresh new look, it’s time to add those essential finishing touches that bring your newly painted laundry room to perfection. Start by reassembling the space with both functionality and style in mind. Consider reintroducing any essential appliances, folding tables, or storage units strategically to maximize space and promote ease of use. Wall-mounted or vertical storage solutions can help keep the room organized, avoiding clutter that could detract from your newly revamped, modern aesthetic.
Adding decorative elements like artwork or floating shelves can also enhance the space. Use these to showcase colorful decor or practical items such as jars for laundry essentials, integrating both form and function. It’s a chance to personalize the room and infuse it with character while maintaining the cohesive flow you’ve established throughout your home.
In terms of maintenance, regular cleaning is vital to preserve the pristine condition of your painted surfaces. Dust and clean walls with a damp cloth periodically, especially if your laundry room is adjacent to a more utilitarian space like a garage where grime might be an issue. If you have used washable paint, you’ll find it easier to manage any stains or scuffs that can occur from daily use.
Ensuring the longevity of your paint job also involves keeping an eye on areas prone to wear, like around appliances or frequently touched spots, such as light switches. Applying touch-up paint promptly when wear becomes visible can keep the space looking fresh and new for years to come.
As you’ve focused on aligning your laundry room with a smart home design, consider incorporating technology that adds convenience and efficiency. Smart lighting solutions, for example, can adapt to the time of day or task lighting requirements, making laundry tasks more enjoyable and energy-efficient.
A careful balance of aesthetic and practical additions, combined with regular upkeep, will not only maintain the appeal of your modern laundry room but will elevate it as a functional and stylish component of your smart home. With these elements in place, you’ll have transformed a once-overlooked area into a visually appealing and highly efficient space that meets all your household’s needs, demonstrating both your design acumen and practicality.
In conclusion, painting your laundry room is an excellent opportunity to transform it into a harmonious and functional part of your home. By meticulously choosing a color palette, gathering essential tools, preparing the room, and following a detailed painting process, you can achieve a room that blends style with utility. Implementing finishing touches and regular maintenance ensures that your modern, smart home design remains both appealing and efficient for years to come.