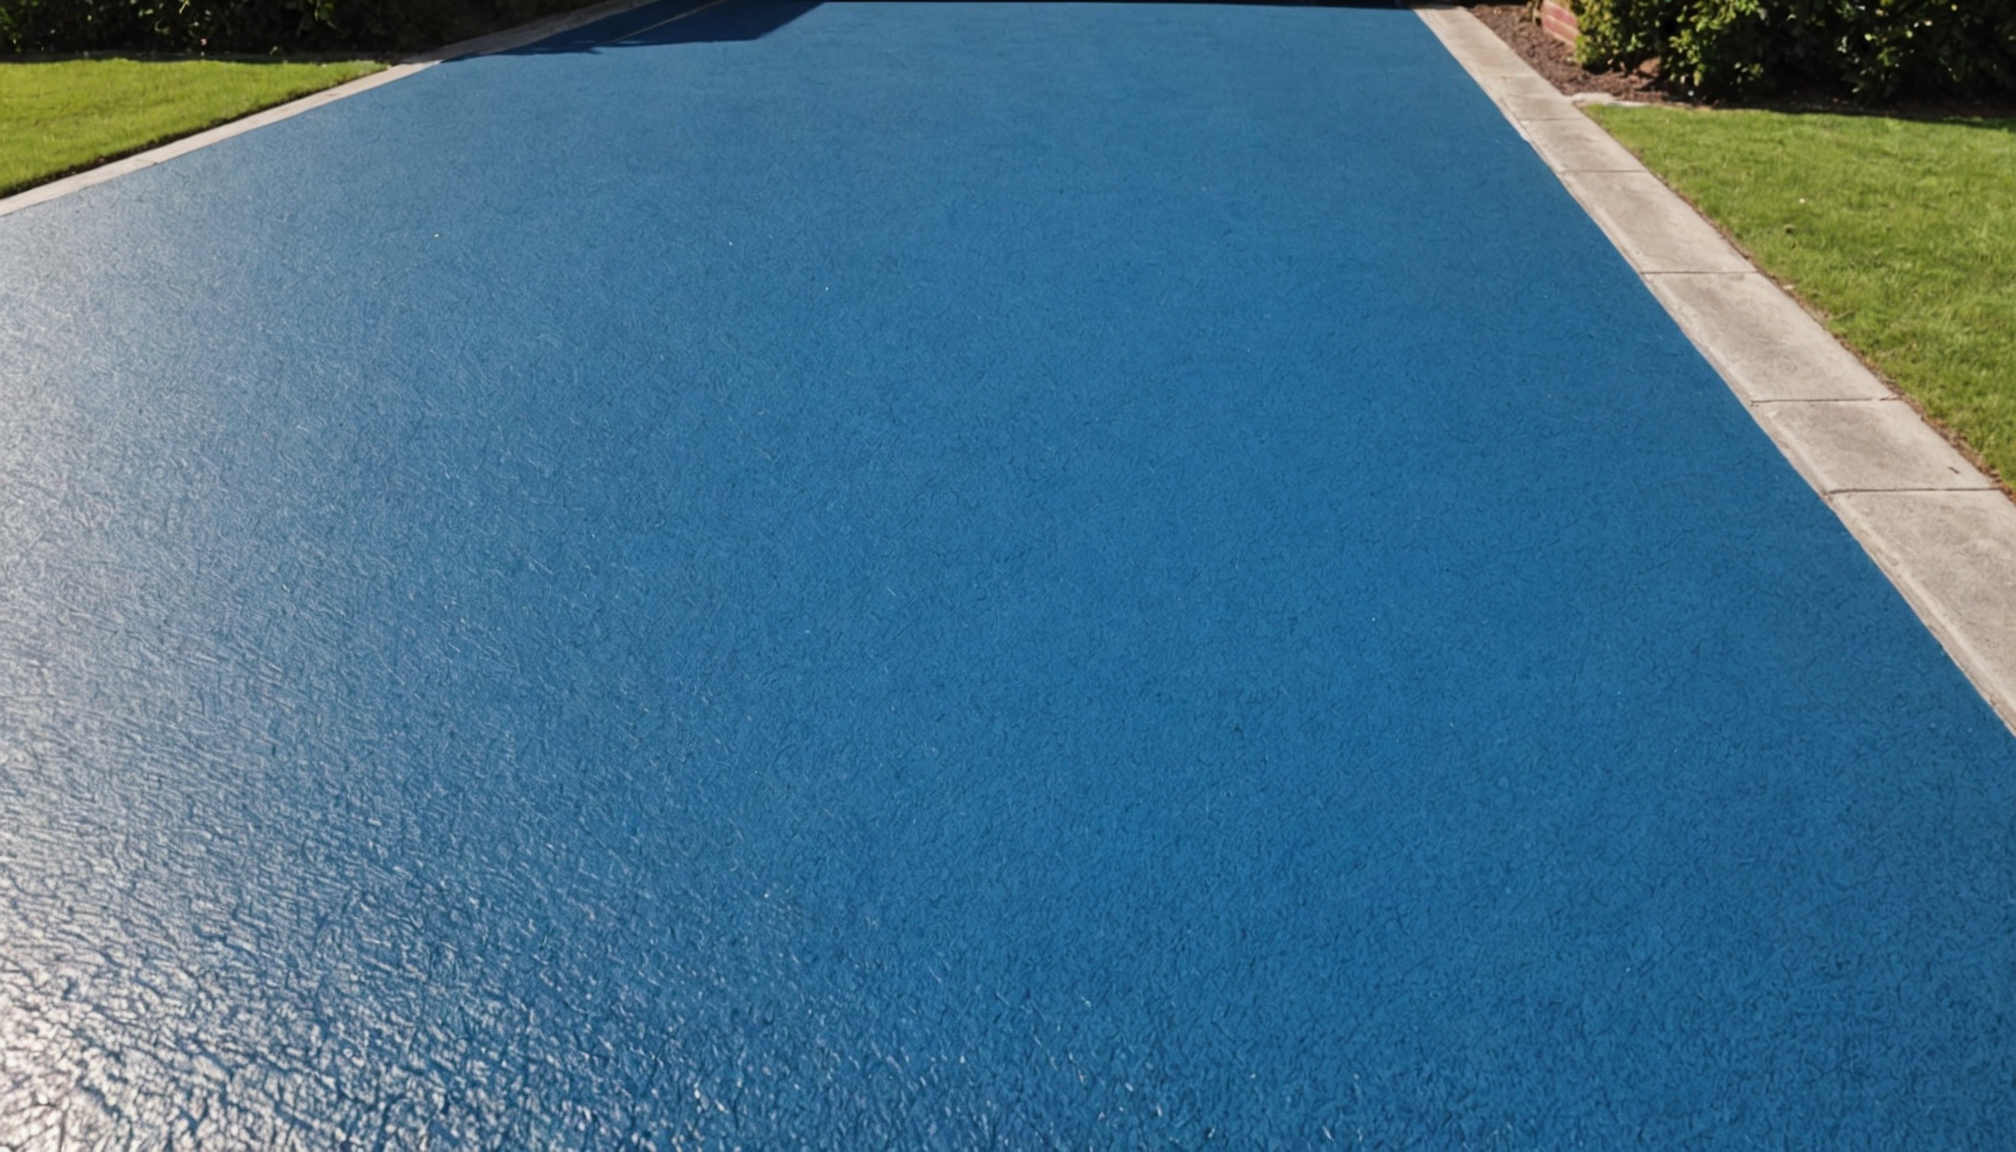
When it comes to enhancing your home’s curb appeal, selecting the appropriate paint for your driveway is a crucial step. The choice of paint will greatly influence not only the aesthetic appeal but also the longevity and overall durability of your driveway surface. Making an informed decision is essential, so let’s delve into the various options available and how they rank according to essential criteria.
First, consider the types of paint specifically designed for outdoor use on driveways. There are primarily three types to choose from: epoxy, acrylic, and polyurethane. Each type offers specific benefits and characteristics that make them suitable for different climates and usage scenarios.
- Epoxy Paint: Renowned for its durability and resistance to abrasions and chemicals, epoxy paint is an excellent choice for driveways that experience a high volume of vehicle and foot traffic. While typically more expensive, it promises longevity, making it a wise investment for those concerned about frequent repainting. However, this option might not fit every budget.
- Acrylic Paint: This type of paint is favored for its quick drying time and UV resistance. Acrylic paint can handle moderate driveway usage and provides substantial protection against weathering, making it suitable for family homes in sunnier climates. Additionally, it offers a more budget-friendly option without sacrificing quality.
- Polyurethane Paint: Known for its elastic nature, polyurethane paint is resistant to cracking, which can be particularly advantageous in climates that see extreme temperature fluctuations. This paint adapts well to the driveway’s natural expansion and contraction.
To guide your selection further, here is a comparative table highlighting the key attributes of each paint type:
| Paint Type | Durability | Weather Resistance | Cost | Best For |
| Epoxy | High | Good | Higher | High Traffic Areas |
| Acrylic | Moderate | Excellent | Moderate | Budget-Conscious Families |
| Polyurethane | Moderate | Excellent | Higher | Extreme Weather Conditions |
While considering the paint type, it’s also vital to take into account the specific conditions your driveway will face. This includes exposure to sunlight, precipitation, and whether your household frequently uses heavy vehicles or sees a lot of playtime activities where children and pets could add to the wear and tear. Additionally, think about any electrical installations or lighting systems integrated into your driveway that might require special considerations for paint application around them.
Ultimately, the right paint choice will hinge not only on these practical concerns but on your personal preference regarding the visual outcome. It’s wise to consult with a professional paint supplier or contractor who can provide specialized advice tailored to your environment and family’s lifestyle. They can help ensure that your selected paint type complements both your home aesthetics and meets your driveway’s functional demands.
Preparing your driveway for painting
 Before you begin the painting process, proper preparation of your driveway is essential. This step ensures the longevity and quality of your paint job, no matter which type of paint you choose. Poor preparation can lead to peeling, cracking, or other issues down the line, so take the time to do it right. Here’s how you can efficiently prepare your driveway for painting:
- Clear the Surface: Begin by removing all vehicles, furniture, or other objects from the driveway. Make sure the area is completely clear to avoid any obstacles during the painting process. If your driveway has any electrical installations, mark those spots, so they’re not accidentally painted over.
- Clean the Driveway Thoroughly: Use a high-pressure washer to eliminate dirt, dust, and debris. Pay special attention to oil stains, which can hinder paint adhesion. A degreaser specifically designed for driveways can be particularly effective in breaking down stubborn spots.
- Repair Cracks and Holes: Inspect the driveway for any cracks or holes. Use a concrete filler or patching compound to fix these imperfections. Allow ample time for these repairs to cure according to the product’s instructions, as jumping to the next step too soon can compromise the integrity of the paint.
- Etch the Surface: This step is essential for driveways that appear shiny or slightly slick. Applying a concrete etcher will create a slightly rougher texture, promoting better paint adhesion. Follow the manufacturer’s instructions carefully and ensure the surface is thoroughly rinsed and dry before moving on.
- Let the Area Dry Completely: Once washed and repaired, the driveway needs to dry completely. Plan your project according to weather conditions—dry, sunny days are ideal to ensure the surface is bone-dry before painting, which prevents moisture from getting trapped underneath the paint layer.
- Mask Surrounding Areas: Protect any areas that you don’t want to be painted. Use painter’s tape along the edges of your driveway next to lawns, gardens, or pathways. This step is crucial for creating clean lines and ensuring that paint does not accidentally stain areas where it’s not intended.
- Prime the Driveway: If your chosen paint product requires it, apply a suitable primer. A primer can enhance paint adherence, resulting in smoother and more even coverage. It is particularly beneficial if your driveway is subject to heavy family use or harsh weather conditions that demand extra durability from the paint.
By meticulously following these steps, you set a firm foundation for your painting project, enabling the paint to endure wear and tear from both usage and climate elements, achieving a result that is visually appealing and long-lasting.
Applying the base coat effectively
With your driveway meticulously prepared, it’s time to focus on applying the base coat. The key to a successful paint job lies in the careful and thorough application of this initial layer. The base coat is fundamental, providing a uniform surface that ensures the subsequent paint layers adhere properly, and wear evenly over time. Here’s how to effectively apply the base coat and set your project on the path to precision and durability.
Firstly, choosing the right tools for the job cannot be overstressed. A broad, high-quality paint roller with an extension handle will allow you to cover a large area swiftly, minimizing the potential for uneven layers and streaks. For edges and corners where precision is critical, a smaller brush works perfectly, offering more control and better access to tight spaces.
Begin by stirring your paint thoroughly to ensure a consistent color and texture throughout the application. Uneven mixing can lead to color variations that disrupt the overall aesthetic of your driveway. Before you start painting, double-check the weather forecast and aim for a day with mild temperatures and low humidity. Strong sunlight or excessive moisture can prematurely dry or impair the base coat, leading to a compromised finish.
As you start applying the paint, pour a manageable amount of it into a paint tray to avoid over-application and drips. Begin at one end of the driveway, working in manageable sections to maintain a wet edge that will help prevent lap marks. Apply the paint in a thin, even layer, using long, steady strokes. Overloading the roller with paint can result in unsightly drips and extended drying times.
When applying the base coat, patience is your ally; a methodical approach will pay off in the long run. Allow the base coat to dry thoroughly, adhering to the manufacturer’s recommended drying times. This step is crucial, especially if your driveway sees a lot of activity or extreme weather conditions, both of which demand a durable underlayer that is thoroughly cured.
With proper application techniques, your driveway will boast a seamless finish free of bubbles or brush marks. Once the base coat is adequately dry, you can confidently move on to subsequent layers or additional design elements, knowing you have established a strong foundation that will resist the rigors of daily use and weather fluctuations. Employing these steps diligently not only accentuates your driveway but also extends the life of your paint job, offering a noteworthy return on investment and the gratification of a job well done.
Creating designs and patterns
Now that the base coat is perfectly in place, you have the opportunity to infuse your personal style into your driveway by experimenting with creative designs and patterns. This step is where your driveway can truly reflect your personality, enhance your home’s aesthetic appeal, and potentially add value to your property. Designs range from simple geometric shapes to intricate motifs, each offering a unique visual impact.
Start by envisioning the overall look you’d like to achieve. Consider the architecture of your home, your garden layout, and even your neighborhood’s style. Simplicity can be as striking as complexity, so decide whether a minimalist approach with clean lines suits your taste or if a more elaborate pattern aligns with your driveway aspirations. Remember, a cohesive design can seamlessly integrate your driveway with your home’s overall aesthetic.
For those inclined towards straightforward yet effective design, geometric shapes like stripes, chevrons, or checkerboard patterns are excellent choices. These can be achieved using painter’s tape to demarcate areas that will form part of the pattern. Painter’s tape is particularly handy for creating crisp, clean lines, and it’s budget-friendly, making it suitable for DIY projects without a professional’s pricetag. For a driveway that complements a modern architectural style, bold stripes can add a dynamic flair, drawing the eye along the length of the space.
For the more ambitious or artistic at heart, consider stenciling to reproduce more intricate designs. Stencils come in a wide variety of patterns and can be custom-made to align with your specific vision. They allow for detailed work and can be a fun family project, where everyone can contribute to painting. This approach not only personalizes the space but also creates a shared experience, turning a simple driveway makeover into a meaningful family memory.
While planning these patterns, take into account any driveways features such as electrical fixtures or adjoining garden beds. It’s essential that your design not only looks good but is also practical and fits seamlessly with all driveway components. Ensure these elements are integrated into your design strategy to avoid any disruption to both function and aesthetics.
Once you’ve settled on your design, prepare your colors carefully. Choosing paints that complement your home’s color palette can create a striking harmony throughout your property. Even small adjustments, like aligning your design colors to those of your garden flowers or house trim, can amplify the beauty of the entire area. Whether you decide on bold contrasting colors or a subtle monochromatic scheme, make sure your paint is suitable for external use and provides durability against daily wear and climate conditions.
Armed with your pattern, design tools, and the appropriate paint, take a deep breath—this is your chance to transform an ordinary feature into an extraordinary aspect of your home. If possible, enlist the help of family members or friends to tackle larger patterns, ensuring the design remains consistently applied throughout the driveway. By investing time and thought into this stage, you’ll create a genuinely personalized space that invites admiration and compliments your property, offering a sense of satisfaction and pride every time you return home.
Sealing and maintaining your driveway paint
Once you’ve completed the painting process, preserving the finish and vibrancy of your driveway comes down to effective sealing and ongoing maintenance. Applying a sealer is crucial, as it acts as a protective barrier against the elements, ensuring the longevity and resilience of your paint job. Choose a high-quality sealer designed for the specific type of paint used on your driveway; water-based acrylic sealers are commonly favored for their ease of application and quick drying time, while solvent-based sealers offer enhanced durability against heavy usage and harsh weather conditions.
Begin by cleaning the painted surface thoroughly; even small debris or dust particles can compromise the sealing process. A gentle sweep followed by a light wash, and ensuring the surface is completely dry, will create an optimal base for your sealer. If you’ve invested time and budget into intricate patterns or designs, applying the sealer with a clear roller will preserve these features without dulling the detailed work you’ve achieved.
When applying the sealer, plan for two thin, even coats rather than a single heavy application. This approach avoids buildup that can cause uneven drying or discoloration. Allow ample time for the first layer to dry completely before applying the second, paying close attention to manufacturer recommendations regarding drying times and conditions. Ideal weather—mild temperatures with no forecasted rain—is essential for effective curing, akin to when you applied the paint.
After sealing, establish a regular maintenance routine to keep your driveway in top condition. Rinse the surface periodically with a garden hose to remove dust and prevent dirt buildup, particularly if your driveway encounters frequent vehicle traffic or family gatherings. A mild detergent can tackle more stubborn stains without harming the paint or sealer.
Inspect your driveway annually for signs of wear or damage. Small cracks can usually be dealt with quickly using patching materials suitable for painted surfaces, ensuring they are addressed before exacerbating into larger issues. Regular maintenance not only preserves the cosmetic appeal but also saves you from costly repairs in the future, maximizing the return on your investment.
By taking these steps to seal and maintain, your driveway will continue to stand as a testament to your creative efforts and hard work, sustaining its appeal year after year.
—
In conclusion, transforming your driveway with a new paint job can significantly enhance your home’s curb appeal while also offering personal satisfaction. Through careful selection of materials, diligent preparation, meticulous application, and thoughtful design, a driveway can evolve from a mere functional space into an element that elevates the entire property. With the added protection of a sealer and a consistent maintenance routine, you’ll ensure that your investment remains vibrant and durable, welcoming you home with style and grace for many years to come.