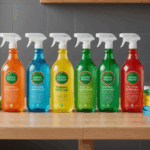
When it comes to cleaning glass surfaces, selecting the appropriate cleaning solution is crucial for achieving a streak-free gleam. The variety of cleaning products available can make this choice overwhelming, but understanding their composition and suitability for different types of glass can simplify the decision-making process.
Primarily, you’ll want to ensure that the cleaning agent you’re using is formulated to dissolve and remove common residues that accumulate on glass, such as dust, grease, and fingerprints. Most glass cleaners will contain ingredients like ammonia or vinegar, both of which are effective at cutting through grime without leaving streaks. However, it’s essential to be aware of your environment and any chemical sensitivities before selecting a cleaning product.
- Ammonia-based cleaners: These are highly effective for removing tough stains and are widely available. However, they should not be used on tinted glass as they can cause discoloration over time.
- Vinegar-based solutions: These are more environmentally friendly and safe for most glass surfaces, including those with tints. They effectively prevent streaking and can be easily made at home by mixing equal parts of vinegar and water.
- Alcohol-based cleaners: Often used for their quick drying properties, these are ideal for when time is of the essence, such as commercial cleaning where turnaround is critical.
- Natural cleaner blends: Combining ingredients like essential oils with vinegar or baking soda can create pleasant-smelling, effective cleaners that are gentle on the environment and safe for use around children and pets.
To illustrate the properties and appropriate usage of these cleaners, consider the table below, which compares their attributes and provides guidance on their application:
| Type of Cleaner | Effective Against | Best Use | Cautions |
| Ammonia-based | Stubborn grease, oil stains | Untreated glass, bathrooms | Avoid on tinted glass, fume sensitivity |
| Vinegar-based | General grime, fingerprints | Most types of glass, eco-friendly cleaning | Irritation for those sensitive to vinegar smell |
| Alcohol-based | Quick drying of fingerprints, spots | High-traffic areas, commercial spaces | Flammable, proper ventilation needed |
| Natural blends | General dirt with added fragrance | Eco-conscious homes, all glass | Less powerful on tough stains |
Ultimately, the best glass cleaning solution will depend on your specific needs and circumstances. Consider not only the effectiveness but also environmental impact and safety for those in the space being cleaned. By selecting a cleaning solution that aligns with these factors, you can ensure that your glass surfaces remain pristine while minimizing adverse effects on your health and surroundings.
tools you’ll need for a streak-free shine
Equipping yourself with the right tools is just as important as choosing the right cleaning solution when aiming for a streak-free finish on your glass surfaces. Having the proper tools not only makes the task easier and more efficient but also helps in achieving that professional-level gleam. Here’s a rundown of the essential tools you’ll need to ensure your glass surfaces shine without streaks:
- Microfiber Cloths: These are a must-have for glass cleaning. Unlike regular cloths, microfiber is designed to attract and hold dirt, grease, and dust due to its intricate fiber structure. Additionally, microfiber is soft and gentle on surfaces, preventing scratches, and it’s highly absorbent, which makes it ideal for reducing streaks.
- Squeegees: For large glass surfaces like windows and shower doors, squeegees are invaluable. They quickly remove excess water and cleaning solution for a gleaming finish. Opt for a squeegee with a rubber blade, as it provides a close fit to the glass, preventing streaks.
- Spray Bottles: Even if you choose to buy a prepared glass cleaner, having a spray bottle allows you to dilute solutions or create your own cleaning blends. Choose a spray bottle with an adjustable nozzle to control the amount of cleaner applied.
- Lint-Free Towels: Use these for drying and buffing the glass after washing. Good options include old newspapers, which are low-cost and unlikely to leave lint, or specialty towels made for glass cleaning.
- Detailing Brushes: These small brushes are perfect for reaching corners and edges where dust and grime collect, such as around window frames and in etched glass designs.
- Step Ladders: For cleaning higher windows, a sturdy step ladder provides the height you need to reach and clean safely. Ensure it’s stable and the right height for your job.
- Cotton Swabs: Handy for cleaning the tiniest of corners and crevices, especially in decorative glass items, where regular cloths can’t reach.
- Protective Gloves: Consider these if you’re using stronger chemical cleaners, to protect your skin from potential irritation or reactions.
Each tool serves a specific purpose and, when used correctly, contributes to a spotless and streak-free finish. By investing in these essential tools and using them properly, you ensure not only effectiveness but also efficiency in maintaining impeccably clean glass surfaces. Proper care of these tools, such as regularly washing microfiber cloths and replacing worn squeegee blades, will also extend their usefulness and performance.
step-by-step cleaning techniques
Embarking on the task of cleaning glass can seem daunting at first, but by following a systematic approach, you can achieve a stunning, professional-level shine. Begin by preparing your space; ensure that the area is free from obstructions and that you have easy access to all parts of the glass surface. Start with a dry dusting using a microfiber cloth to remove loose dirt and debris. This preliminary step helps prevent scratching during the cleaning process.
Once the initial dusting is complete, spray your chosen cleaning solution evenly across the surface. Position your spray bottle at least six inches away from the glass to ensure an even mist without excessive liquid pooling. It’s important to avoid over-saturating the glass as this can lead to streaking.
With the cleaning solution applied, use a microfiber cloth or squeegee, depending on the size of the surface, to begin working from top to bottom. Using vertical strokes aids in directing the dirt downward, preventing any unsettled grime from being spread across the areas already cleaned. Be thorough yet gentle, allowing the cleaning tool to glide over the surface without applying excessive pressure, which can leave streaks.
In tricky corners or edges where dirt often accumulates, employ a detailing brush or cotton swabs, using them to dislodge any lingering grime or dust. These intricate areas require more focus to ensure no residue is left behind, maintaining the overall clarity of the glass.
After the majority of the surface has been cleaned, switch to a lint-free towel for drying. This final step is vital in eradicating any remaining streaks or excess cleaning solution. As you buff the surface, check it from various angles to catch any missed spots that may require additional attention. A good rule of thumb is to work in sections, particularly for larger windows or doors, completing one section at a time to ensure consistency.
Finally, for optimal results, consider the timing: Clean glass when the sun isn’t shining directly on it to avoid rapid drying that can cause streaks. Choosing a cloudy day or timing your cleaning in the early morning or late afternoon will help achieve a seamless finish.
By following these methodical steps, not only will your glass look immaculate, but this disciplined approach ensures minimal effort and maximum efficacy, leaving you with pristine, streak-free glass every time.
tips for cleaning different types of glass
Cleaning different types of glass requires tailored techniques to ensure effective results without damage. Begin by identifying the specific type of glass you are about to clean, as different surfaces may have unique characteristics and vulnerabilities.
For standard windows, regular cleaning with a simple vinegar and water solution or a commercial glass cleaner is generally effective. Remember to use a microfiber cloth or a squeegee to avoid streaks.
When dealing with tinted windows, it’s crucial to avoid ammonia-based cleaners, as they could cause discoloration or damage the tint film. Instead, opt for a vinegar solution or a cleaner labeled safe for tinted glass to preserve the window’s quality.
Frosted glass, often used in bathrooms or decorative pieces, might need a bit more diligence due to its textured surface, which can trap dirt more easily. Use a soft sponge for scrubbing and a gentle cleaner; avoid abrasive materials to maintain the texture without causing scratches.
Leaded glass and stained glass, commonly found in decorative windows or antique pieces, should be cleaned with care. These types are more fragile and may have delicate joinings. A mild dish soap diluted in water works well; apply gently with a microfiber cloth. Avoid soaking these windows, especially if they are historic, as excess moisture could damage the lead.
For glass tabletops, start by removing any loose debris with a dry cloth. Then use a classic glass cleaner or a homemade vinegar-water solution. Squeegees or microfiber cloths will ensure a streak-free finish. To deal with scratches or scuff marks, consider using a specialized glass polish product.
Cleaning mirrors requires a slightly different approach; ensure there is no overspray on the backing as it might lead to damage over time. Use minimal liquid on a microfiber cloth and clean in small sections to prevent streaks.
Lastly, for etched glass, where the surface may be uneven due to design, careful attention is needed. Use a soft brush along with your cleaner to ensure all crevices are thoroughly cleaned, but avoid excessive scrubbing to maintain the integrity of the etching.
In every case, following up with a dry cloth to buff and dry the surface will prevent water spots. Always remember to check for streaks and address any missed areas for that flawless finish.
common mistakes to avoid
Achieving a spotless finish on glass surfaces involves avoiding some common pitfalls that can undermine your efforts. One frequent mistake is using paper towels for drying or cleaning. While they may seem convenient, paper towels often leave behind lint, which creates unwanted residue and can interfere with the clarity of the glass. Instead, rely on microfiber cloths or lint-free towels for a cleaner result.
Another typical error is cleaning glass on a sunny day. Direct sunlight speeds up the drying process, causing the cleaning solution to evaporate too quickly and leaving behind streaks. It’s better to clean when there’s diffused light, such as on overcast days or during early morning and late afternoon, to allow the solution ample time to work effectively without being accelerated by heat.
Using too much cleaning solution is also a common misconception. Oversaturating surfaces doesn’t increase cleanliness; in fact, it often leads to streaks and increases the labor needed for drying. Always apply the solution in controlled, targeted amounts—enough to cover the glass but not drench it.
Applying too much pressure during cleaning can be counterproductive as well. Excessive force may scratch the glass or cause uneven polish, especially on delicate surfaces like frosted or etched glass. Gentle, consistent strokes are sufficient to lift dirt and achieve a polished finish without harming the glass.
Failure to use the right cleaner type for specific glass can lead to damage. For instance, ammonia-based products, while powerful, can discolor tinted glass or exacerbate corrosion on older or more delicate pieces. Always tailor your choice of cleaner to the material at hand, considering both its strengths and potential risks.
Finally, neglecting to regularly clean your tools can compromise your cleaning efforts. Dirty cloths or brushes simply relocate dirt rather than removing it. Ensure tools are clean and well-maintained; replace items like squeegee blades and microfiber cloths as they wear to sustain their performance over time.
Keeping these common mistakes in mind helps improve your glass cleaning routine, leading to better results and protecting your glass surfaces from unnecessary wear and damage.
In conclusion, mastering the art of cleaning glass involves a combination of selecting the right products, employing efficient tools, applying meticulous techniques, and avoiding common missteps. By embracing these strategies, you can enjoy gleaming, streak-free glass surfaces in every part of your home or workplace, reflecting the care and precision of a true professional.