Choosing the right paint for your garage can significantly impact not only the aesthetics but also the functionality and energy efficiency of the space. It’s essential to consider various factors such as the type of surface you’re painting, the conditions your garage is typically exposed to, and any additional benefits like energy savings that the paint might provide.
The first consideration is the specific area you’re looking to paint. Garage surfaces can include walls, ceilings, and floors, and each requires its unique type of paint. For walls and ceilings, latex or oil-based paints are generally sufficient, but when it comes to flooring, you’ll need something more durable, such as epoxy paint or specialized acrylic formulations, which provide greater resistance to stains and abrasions.
Another crucial factor is the environment within your garage. Garages often face significant temperature fluctuations and humidity changes, so it’s imperative to choose a paint with high durability and resistance to these factors. Look for paints specifically designed for use in high-moisture areas or that contain mold and mildew inhibitors if your garage is not well-ventilated.
In terms of color selection, lighter colors can help enhance natural light, helping to increase brightness and even potentially contributing to energy savings by reducing the need for artificial lighting. Moreover, reflective or light-colored paints can help regulate temperature by reflecting heat, adding another layer of efficiency to your garage setup and contributing to a smart home environment.
Here is a quick comparison of paint types and their suitable applications:
| Paint Type | Applications | Benefits |
| Latex Paint | Walls, Ceilings | Quick-drying, Low VOC, Easy Cleanup |
| Oil-Based Paint | Walls, Woodwork | Durable, Stain-resistant |
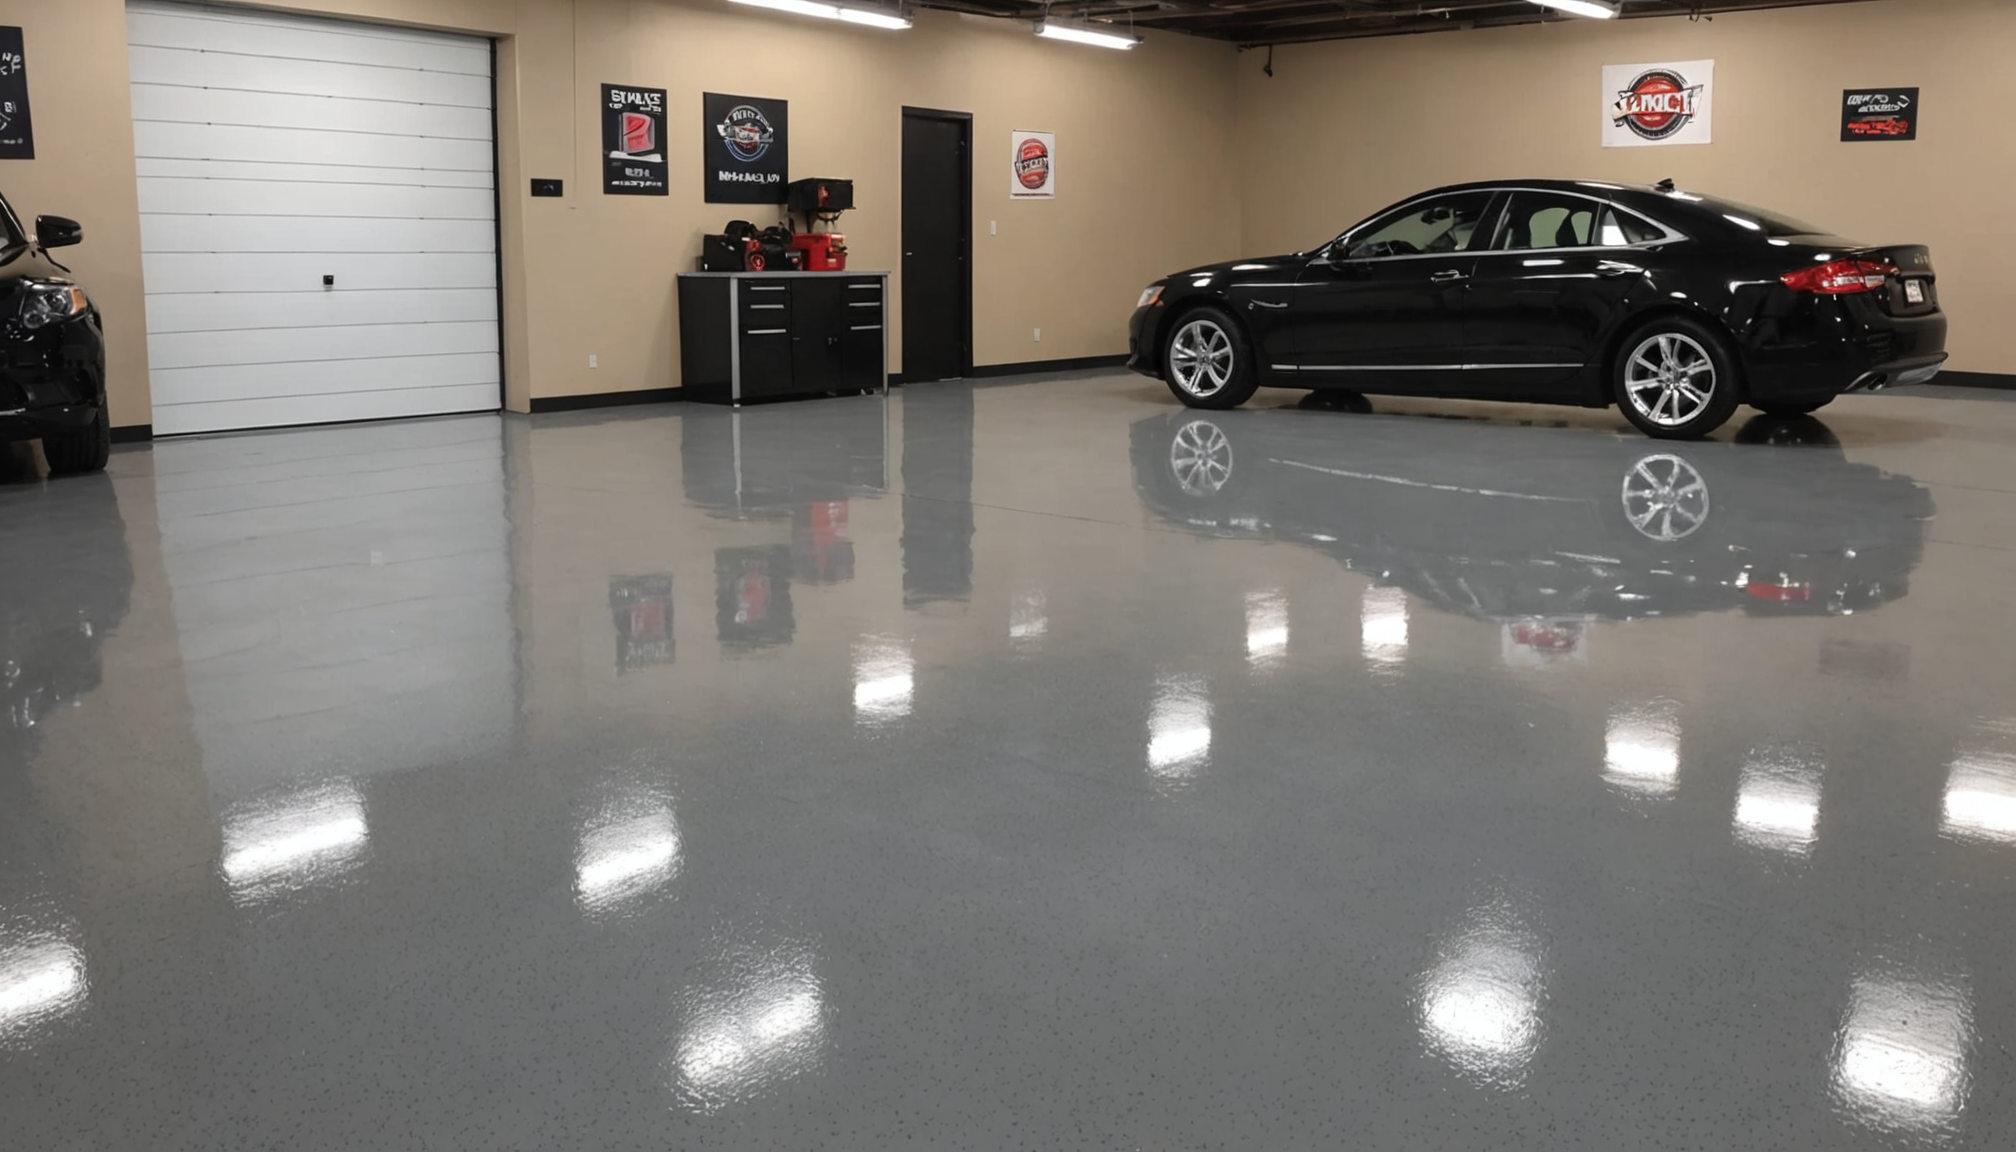
| Epoxy Paint | Flooring | High Durability, Resistant to Chemicals and Stains |
| Acrylic Floor Paint | Flooring | Fast-drying, Easy Application, Durable Finish |
Selecting the right color and type of paint can also have long-term effects on the maintenance and upkeep required. A high-quality paint designed for specific conditions will generally require fewer touch-ups over time, making it a cost-effective choice in the long run. Investing in paint quality now can lead to reduced maintenance efforts and better preservation of your garage surfaces.
Incorporating these considerations into your paint selection process ensures you make an informed decision that enhances both the beauty and utility of your garage while aligning with broader goals such as energy efficiency and smart home integration.
Gathering your materials
To successfully paint your garage, gathering the right materials is essential to ensure a smooth and efficient process. Having all the necessary tools and supplies at hand can make the painting job more organized and less time-consuming. Here’s a detailed guide on what you need to gather before you start.
- Paint and Primer: Ensure you have the correct type of paint for each surface you intend to paint in your garage, including walls, ceilings, and floors. Don’t forget a suitable primer, especially if you are painting a surface that’s never been painted before or is particularly glossy.
- Painting Tools:
- Rollers and Brushes: Different surfaces require different tools. Use high-quality rollers for walls and ceilings and smaller brushes for corners and edges.
- Paint Trays and Liners: These are essential for holding paint while you work and can make clean-up easier if you use disposable liners.
- Preparation Tools:
- Sandpaper or Sanding Blocks: Necessary for smoothing out any imperfections on your surfaces before painting.
- Tapes: Painter’s tape is vital for masking off areas you don’t want to be painted, such as trims or fixtures.
- Drop Cloths or Plastic Sheeting: Protect the garage floor and any items that cannot be moved from drips or spills by covering them.
- Safety Gear:
- Gloves: Protect your hands from paint splatters and the chemicals in the paint.
- Goggles: Prevent paint and dust particles from getting into your eyes, particularly when sanding or applying paint to the ceiling.
- Ventilation Masks: Necessary especially in garages where ventilation may be limited to protect from harmful fumes.
- Cleaning Supplies: In case of any spills or mistakes, have cleaning supplies handy, such as rags, buckets of water, or appropriate solvents for the type of paint you’re using.
It’s a good idea to inspect all your materials and tools before you start the actual work to ensure they are in good condition. By gathering everything you need in advance, you can focus on the painting process itself, thus optimizing your effort and time while possibly even contributing to your smart home’s energy savings and maintenance efficiency.
Preparing your garage
Before you begin painting your garage, dedicating time to proper preparation ensures a smooth and durable finish, ultimately maximizing the impact of your efforts. The first step is decluttering the space, which involves removing all objects and furniture from the garage if possible. This allows you to freely move around and provides unobstructed access to the areas that need painting.
Thorough cleaning is crucial in the preparation phase. Begin by sweeping the floor and dusting off surfaces, which eliminates dirt and debris that could interfere with paint adhesion. For the flooring, consider using a pressure washer if possible to remove any stubborn stains and accumulated grime. If your surfaces have oil stains, use a degreaser for effective cleaning. Tackling these issues beforehand ensures a flawless finish for your paint application, enhancing both the aesthetics and the functional benefits of your garage, including potential energy savings.
Next, inspect the walls, ceilings, and floors for any damage such as cracks or holes. Repair these using appropriate fillers or sealants, and allow them to dry completely. Addressing these imperfections not only strengthens the integrity of your paint job but also contributes to a polished look that can be part of a broader effort toward a smart home setup, featuring well-maintained, efficient spaces.
Sanding is another key step, helping to smooth out surfaces for better paint adherence. Use sandpaper or sanding blocks to roughen up glossy surfaces, ensuring the new paint bonds effectively. This step is particularly necessary if you’re transitioning to a different paint type or dealing with surfaces that have not been painted before.
While preparing the garage, don’t neglect to secure electrical outlets and switches with painter’s tape to prevent paint from accidentally splattering onto them. Also, mask edges and trims using the tape to maintain sharp, clean lines during the painting process. Attach drop cloths or plastic sheeting to protect floors and immovable fixtures from paint drips and spills.
By dedicating time and effort to thorough preparation, you’re not only setting the foundation for a successful painting project but also taking proactive steps to ensure your garage contributes effectively to your smart home’s efficiency. Carefully prepared surfaces bond better with flooring and wall paints, ensuring longevity and reducing the need for frequent touch-ups or maintenance.
Painting tips and techniques
When it comes to bringing your garage walls and floors to life, employing effective painting techniques is key to achieving a professional finish. Start by planning the painting sequence for optimal results. Typically, it’s wise to paint from the top down, beginning with the ceiling if it needs a fresh coat. This approach allows any drips or splashes that may occur to land on surfaces you haven’t painted yet, rather than ruining freshly painted walls or floors.
To begin painting, always ensure you’re working in a well-ventilated space. This is particularly important in a garage, where fumes can build up quickly. Use ventilation masks and keep the garage door open to maximize airflow, enhancing safety while you’re working.
For large, flat areas like walls, a roller with an extension handle is your best friend. It helps cover significant areas efficiently and ensures even coverage. When using rollers, employ the “W” technique—start by painting a large “W” on the wall. Then fill in the gaps by rolling over the area. This helps distribute the paint more evenly, reducing the risk of roller marks.
In edges and corners, use angled brushes for precision. Begin with a technique called “cutting in,” which involves painting the edges and corners of walls with a brush before switching to a roller for the main sections. Cutting in allows for clean, sharp lines and ensures those trickier areas get necessary attention.
When painting the floors, especially with epoxy or acrylic formulations that are ideal for garage environments, be systematic. Tape around the perimeter to prevent floor paint from touching the walls, working in sections to allow yourself time to blend and layer the paint evenly. Apply the paint with a thick brush along edges where rollers can’t reach, and then switch to a roller to cover more extensive areas.
If you’re using more than one coat, make sure to allow adequate drying time between coats. Refer to the paint’s instructions for precise timing, but generally, waiting 4 to 6 hours can be optimal for wall paints, and possibly longer for epoxy and floor paints. Remember, patience here contributes to a more durable and professional finish, which aligns with the broader aim of maintaining a smart home environment that prioritizes energy savings and minimal ongoing maintenance.
In areas requiring texture or creative finishing touches, such as faux finishes or stenciling, use a steady hand and consider starting in a less conspicuous area while you perfect your technique. These details can significantly enhance the aesthetic appeal and value of your garage space.
Finally, as you work, always watch out for drips and runs. Catch them early with careful brushwork or a light roller pass to smooth them out. A well-executed paint job can transform your garage into a more functional, enjoyable, and efficient part of your home, harmonizing its aesthetic and practical attributes into the larger context of your smart home goals.
Cleaning up and maintenance
Once you’ve completed the painting of your garage, a thorough cleanup is crucial to ensure that the fresh new look stays pristine and to maintain your tools properly for future use. Start with removing the painter’s tape from trim and edges. Pull it away slowly at a 45-degree angle to avoid peeling any fresh paint off the surfaces. This helps in maintaining the sharp lines between different painted areas, contributing to the professional look achieved.
Next, carefully fold or roll up any drop cloths or plastic sheeting used during the painting process. Be cautious as you do this, as there may still be wet paint on the coverings that can transfer to other surfaces. Once removed, thoroughly dispose of any accidental paint spills or oversaturations with proper cleaning agents suitable for the paint type used.
Focus on cleaning your tools promptly to extend their lifespan. Brushes can be salvaged by rinsing them under lukewarm water if water-based paints were used, or with paint thinner for oil-based varieties. Rollers require similar care, ensuring all paint is removed before allowing them to dry thoroughly. Paint trays should also be cleaned immediately, especially if disposable liners were not used, as hardened paint remnants can render them unusable for future projects.
After the painting area and tools are cleaned, consider the ongoing maintenance of your freshly painted space. Different surface types may require varied upkeep; a sealing wax might enhance the durability of epoxy flooring, while walls might benefit from periodic dusting to retain their fresh appearance. Regular maintenance checks can ensure that any minor scuffs or chips are addressed promptly, protecting the look and function of the garage.
Moreover, consider how these maintenance routines contribute to the overall efficiency of your smart home. For instance, well-maintained paintwork can enhance lighting effectiveness by preventing dirt accumulation that might otherwise dull surfaces, thus promoting natural illumination and potential energy savings. This aligns with creating a space that is not only visually appealing but also functionally in harmony with broader energy-efficient goals.
In conclusion, successfully painting your garage involves thorough preparation, careful application, and diligent aftercare. Each step, from choosing the right paint to maintaining the final finish, integrates into a larger strategy that supports both the aesthetics and the efficiency of your home. By investing time in painting your garage properly, you not only enhance its appearance and durability but also contribute to a more energy-efficient, smart home environment.