Embarking on a wall preparation project requires more than just enthusiasm; selecting the appropriate tools and materials is crucial to achieving a professional finish. The right selection not only makes the task easier but also significantly affects the longevity and appearance of the final result.
When it comes to tools, having a well-stocked toolkit is essential. Some of the basic tools you will need include:
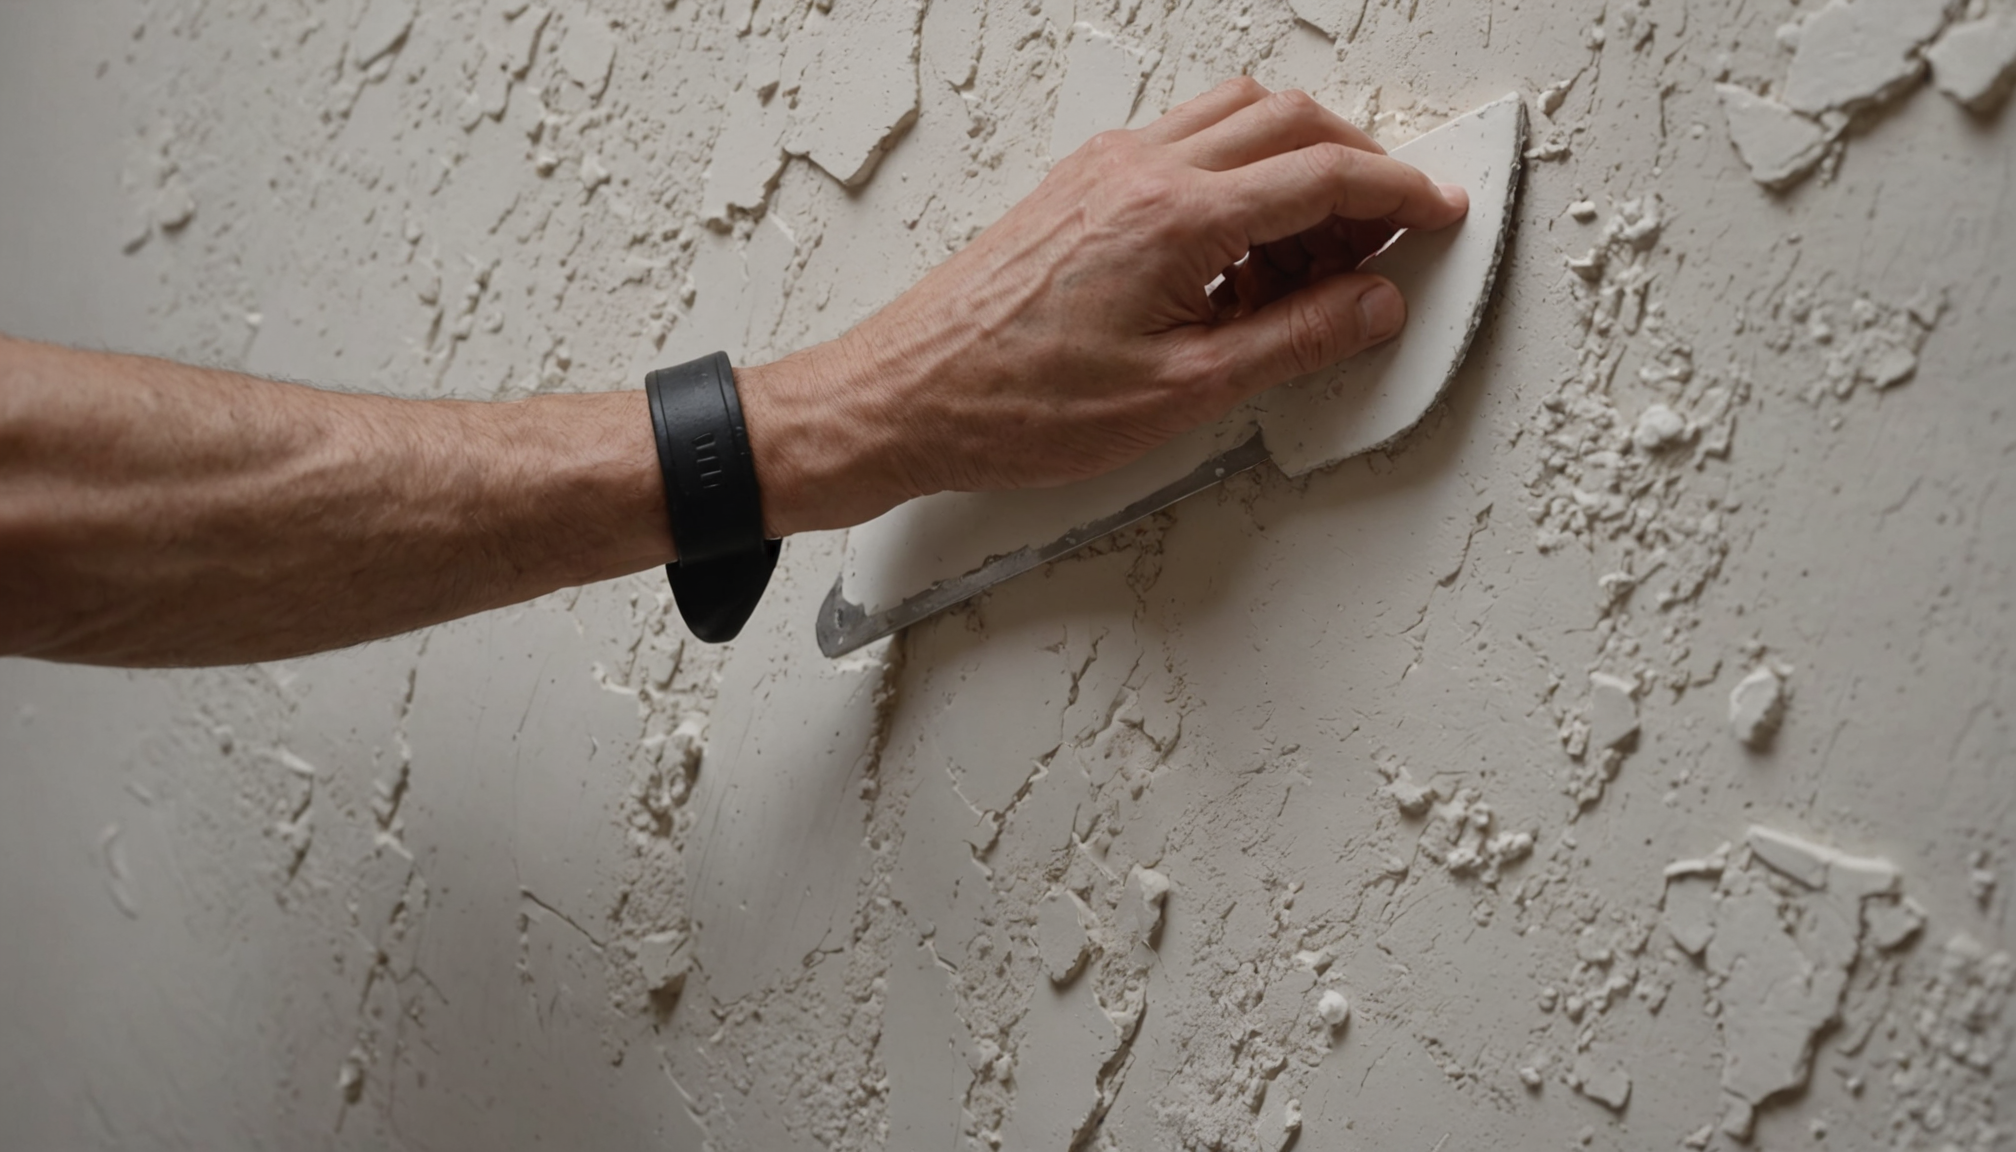
- Putty Knife: A putty knife is versatile, crucial for applying and smoothing filler or spackle into holes and cracks.
- Sanding Block or Electric Sander: This is necessary for creating a smooth surface before painting. An electric sander can speed up the process for larger areas.
- Paint Scraper: This tool assists in removing loose or flaking paint, essential for ensuring new paint adheres properly.
- Dust Mask: Protects you from inhaling dust while sanding, providing safety during the process.
- Protective Eyewear: Essential to shield your eyes from dust and debris.
- Drop Cloths: These protect floors and furniture from dust and accidental paint spills.
The materials you choose are equally crucial. Selecting the right products can make a substantial difference in both the ease of application and the finished look. Consider the following materials:
- Wall Cleaner: Start with a good-quality wall cleaner to eliminate greasy residues and dirt. This helps ensure any adhesive or paint adheres effectively.
- Spackle or Joint Compound: Opt for a high-quality spackle for filling small holes and cracks. For larger repairs, a joint compound may be more suitable.
- Caulk: Flexible caulk is ideal for filling gaps around moldings or between walls and ceilings to prevent paint cracking.
- Primer: A good primer is vital for ensuring the paint adheres well to the surface, especially if the walls are stained or you are switching between drastically different colors.
Understanding the different options can be tricky, so here’s a comparison table to help you select the right materials based on your needs:
| Material | Use | Advantages | Disadvantages |
| Wall Cleaner | Pre-paint cleaning | Ensures surface is free of dust and residue | Extra preparation time required |
| Spackle | Small repairs | Easy to apply and sand | Not suitable for large holes |
| Joint Compound | Larger repairs | Provides a seamless repair | Longer drying time |
| Caulk | Gap filling | Flexible and durable | Can be messy if improperly applied |
| Primer | Undercoat for paint | Improves paint adhesion, covers stains | Additional cost and time |
Having the right tools and materials at your disposal can significantly streamline your wall prep process, ensuring each step is completed efficiently and effectively. It’s a small investment upfront that pays dividends in the final quality and durability of your wall projects.
repairing damage and filling holes
 Before any paint touches the wall, it’s critical to ensure that all existing damage is addressed properly. This stage lays the foundation for your entire project, so taking the time to repair damage and fill holes meticulously is paramount to achieving a smooth and seamless wall finish.
- Identify the Areas Needing Repair:
- Carefully inspect your walls for any dents, holes, or cracks. Make a mental note or use chalk to lightly mark these areas for repair.
- Clean the Damaged Areas:
- Use a damp cloth to wipe away any dust or debris from around the damaged sections. For larger damages, employ a mild soapy solution to eliminate dirt and grime.
- Ensure the area is completely dry before proceeding to the next step to help fillers adhere effectively.
- Smooth Out Rough Edges:
- For cracks or peeling paint, use a paint scraper to gently remove any loose material. Sanding blocks can also be employed to smooth edges around dents and holes.
- Ensure the surrounding area transitions smoothly into the undamaged parts of the wall.
- Prepare the Filler:
- Select the appropriate filler based on the type and size of damage. For small holes and cracks, lightweight spackle is ideal. For larger areas, a joint compound might be necessary.
- Mix the filler if required, following the manufacturer’s instructions to ensure the correct consistency.
- Apply the Filler:
- With a putty knife, scoop a small amount of filler and apply it to the damaged area. Hold the putty knife at a slight angle and press the filler into the hole or crack, smoothing it over the surface.
- Feather the edges by applying pressure outward from the center to blend seamlessly with the surrounding wall.
- For deeper holes, you may need to apply the filler in layers, allowing each layer to dry completely before adding the next.
- Let the Filler Dry:
- Permit the filler to dry according to the manufacturer’s instructions. This step is often influenced by factors such as room humidity and temperature.
- Sand the Repaired Areas:
- Once the filler is dry, use a sanding block or fine-grit sandpaper to lightly sand the area. Aim to create a smooth, even surface that matches the rest of the wall.
- Dust away any residual particles after sanding to ensure a clean surface for the next stages of wall preparation.
By following these steps, you set the stage for a flawless wall treatment. Properly repairing and filling wall imperfections ensures that your paint or wall covering adheres beautifully and lasts for years to come.
cleaning and sanding surfaces
A thorough cleaning and sanding process is an essential step in preparing your walls, ensuring a smooth and professional finish that will enhance the longevity and beauty of your paint job. Properly cleaned and sanded surfaces allow for better adhesion of primers and paints, which is crucial to prevent premature peeling and flaking.
Begin by removing any furniture or coverings near the work area to avoid accidental damage or staining. Lay drop cloths on floors to catch debris and dust. Dust and dirt act like a barrier to primers and paint, so it’s important to ensure that the walls are absolutely clean. Utilize a strong cleanser or a TSP (trisodium phosphate) cleaner for this purpose. This product is particularly effective at cutting through grease and grime, which commonly accumulate on walls over time. Always follow the manufacturer’s instructions when diluting the cleaner; it’s usually mixed with warm water for optimal results. Wear gloves to protect your skin during this process and use a sponge or a cloth to apply the solution, scrubbing the walls gently in a circular motion.
Once cleaning is complete, rinse the walls with fresh water to remove any leftover cleaning solution, then allow them to dry thoroughly. Inadequate drying could lead to paint bubbling or splotchiness, undermining all your hard preparation work.
After the surface is free of contaminants, it’s time to sand. Sanding smooths out any minor imperfections or leftover texture, ensuring that the final finish is sleek and professional. Use a sanding block for smaller areas or an electric sander for larger surfaces to save time. Begin with a coarse-grit sandpaper (around 80-100 grit) for initial rough sanding, especially if there are old paint drips or texture that needs to be removed. Follow this with a finer grit (such as 220 grit) to achieve a silky-smooth finish.
Sanding also helps in giving the walls a slight rough texture, which is optimal for primer and paint to adhere to, as it provides a better grip surface. As you sand, work in gentle, even strokes to prevent gouging the wall; keep checking the smoothness with your hands to ensure a consistent surface.
Once sanding is completed, it’s crucial to eliminate all dust and particles from the walls. Use a vacuum or a clean, damp cloth to go over the surface, paying close attention to corners and edges where dust tends to accumulate. A tack cloth can also be highly effective for picking up fines dust particles that might otherwise be missed.
By cleaning and sanding thoroughly, you lay down an impeccable base for your primer and paint. A well-prepared surface not only enhances the visual appeal of your walls but also significantly extends the life of your paint job, ensuring that your hard work and investment pay off for years to come. Following these detailed steps ensures that you’re set up for a successful wall prep, priming you to move seamlessly forward in your renovation or beautification project.
applying primer effectively
When it comes to applying primer, the execution is just as crucial as selecting the right type. Proper application ensures that your paint adheres well, resulting in a uniform finish that stands the test of time. You’ll want to start by making sure the room is well-ventilated. Open windows and use fans if necessary to circulate air and keep everything safe and comfortable.
Next, gather a high-quality primer tailored to your wall type. For instance, opt for a stain-blocking primer if you’re dealing with patched areas or smoke stains, while a mold-resistant primer is ideal for high-moisture areas like bathrooms. Gently stir your primer to ensure the ingredients are well-combined, which is essential for achieving an even application.
Using a brush or roller, begin with the edges and corners; these areas are often missed when using a roller exclusively. A brush allows precision when cutting in around doors, windows, and ceilings. For large, flat sections, employ a roller with a medium nap. It should be one that’s compatible with the texture of your surface to ensure it spreads the primer evenly. Dip your roller lightly, ensuring it’s adequately covered but not dripping with primer, which could result in an uneven surface.
Apply the primer in small sections, using a technique known as “painting in the W pattern.” Start by rolling the primer onto the wall in the shape of a W, then fill in the gaps without lifting the roller. This helps distribute the primer evenly and prevents build-up that could show through your paint. Maintain consistent pressure as you work to avoid creating lines or streaks.
Be mindful of the manufacturer’s instructions regarding drying time for the primer. It’s usually recommended to wait at least a couple of hours or even overnight, depending on the primer type and ambient conditions, to ensure it’s fully dry before progressing to the painting stage.
Check the walls once the primer has dried completely. If the primer has left a grainy texture, lightly sand with fine-grit sandpaper to smooth any spots, then remove all sanding dust before proceeding.
Remember, a meticulously applied primer layer is the foundation of a professional-quality paint job. It seals against stains, balances wall porosity, and enhances paint adhesion, ensuring your paint glides on smoothly and adheres securely, creating a vibrant, long-lasting finish.
inspecting the prepped surface
After you have applied the primer and allowed it to dry thoroughly, it’s essential to inspect the surface meticulously to ensure you’re ready for the final paint application. Begin by scrutinizing the walls under good lighting conditions. Natural light works best, but if that’s not possible, use bright artificial lighting directed at different angles to spot any imperfections or uneven areas.
Run your hand gently over the wall to feel any inconsistencies that might not be visually apparent. This tactile approach ensures that no bumps or rough spots are left behind. If you encounter any areas that don’t meet the smoothness criteria, lightly sand them using fine-grit sandpaper. Be cautious during this step to avoid damaging the primer layer beneath. Once sanded, remove any dust with a tack cloth or a damp microfiber cloth to maintain a clean surface.
Pay close attention to edges, corners, and areas around switches or outlets, as these are common spots for missed sections or paint buildup. Use a small brush to touch up any areas where the primer appears thin or uneven. This attention to detail is crucial for a uniform appearance across the entire wall.
Take an extra moment to check that there are no signs of peeling or lifting from the primed surface. These can indicate an underlying issue with adhesion, which might require further attention before painting.
If you’ve made repairs during preparation, ensure that they are still seamless after the primer application. Well-repaired spots should blend perfectly with the surrounding wall without creating noticeable patches under the paint.
Inspection is a vital final step before moving on to painting. A well-examined primed surface ensures that you paint on an excellent foundation, leading to a long-lasting and visually stunning finish.
In conclusion, preparing walls like a pro involves careful attention to detail at every step—from choosing the right tools and materials to meticulously repairing, cleaning, sanding, priming, and inspecting surfaces. By investing time and effort into proper wall preparation, you can achieve professional-level results with paint adhering beautifully and maintaining its appeal and durability over the years. Your hard work will be rewarded with walls that exude quality and enhance the aesthetic of your space.