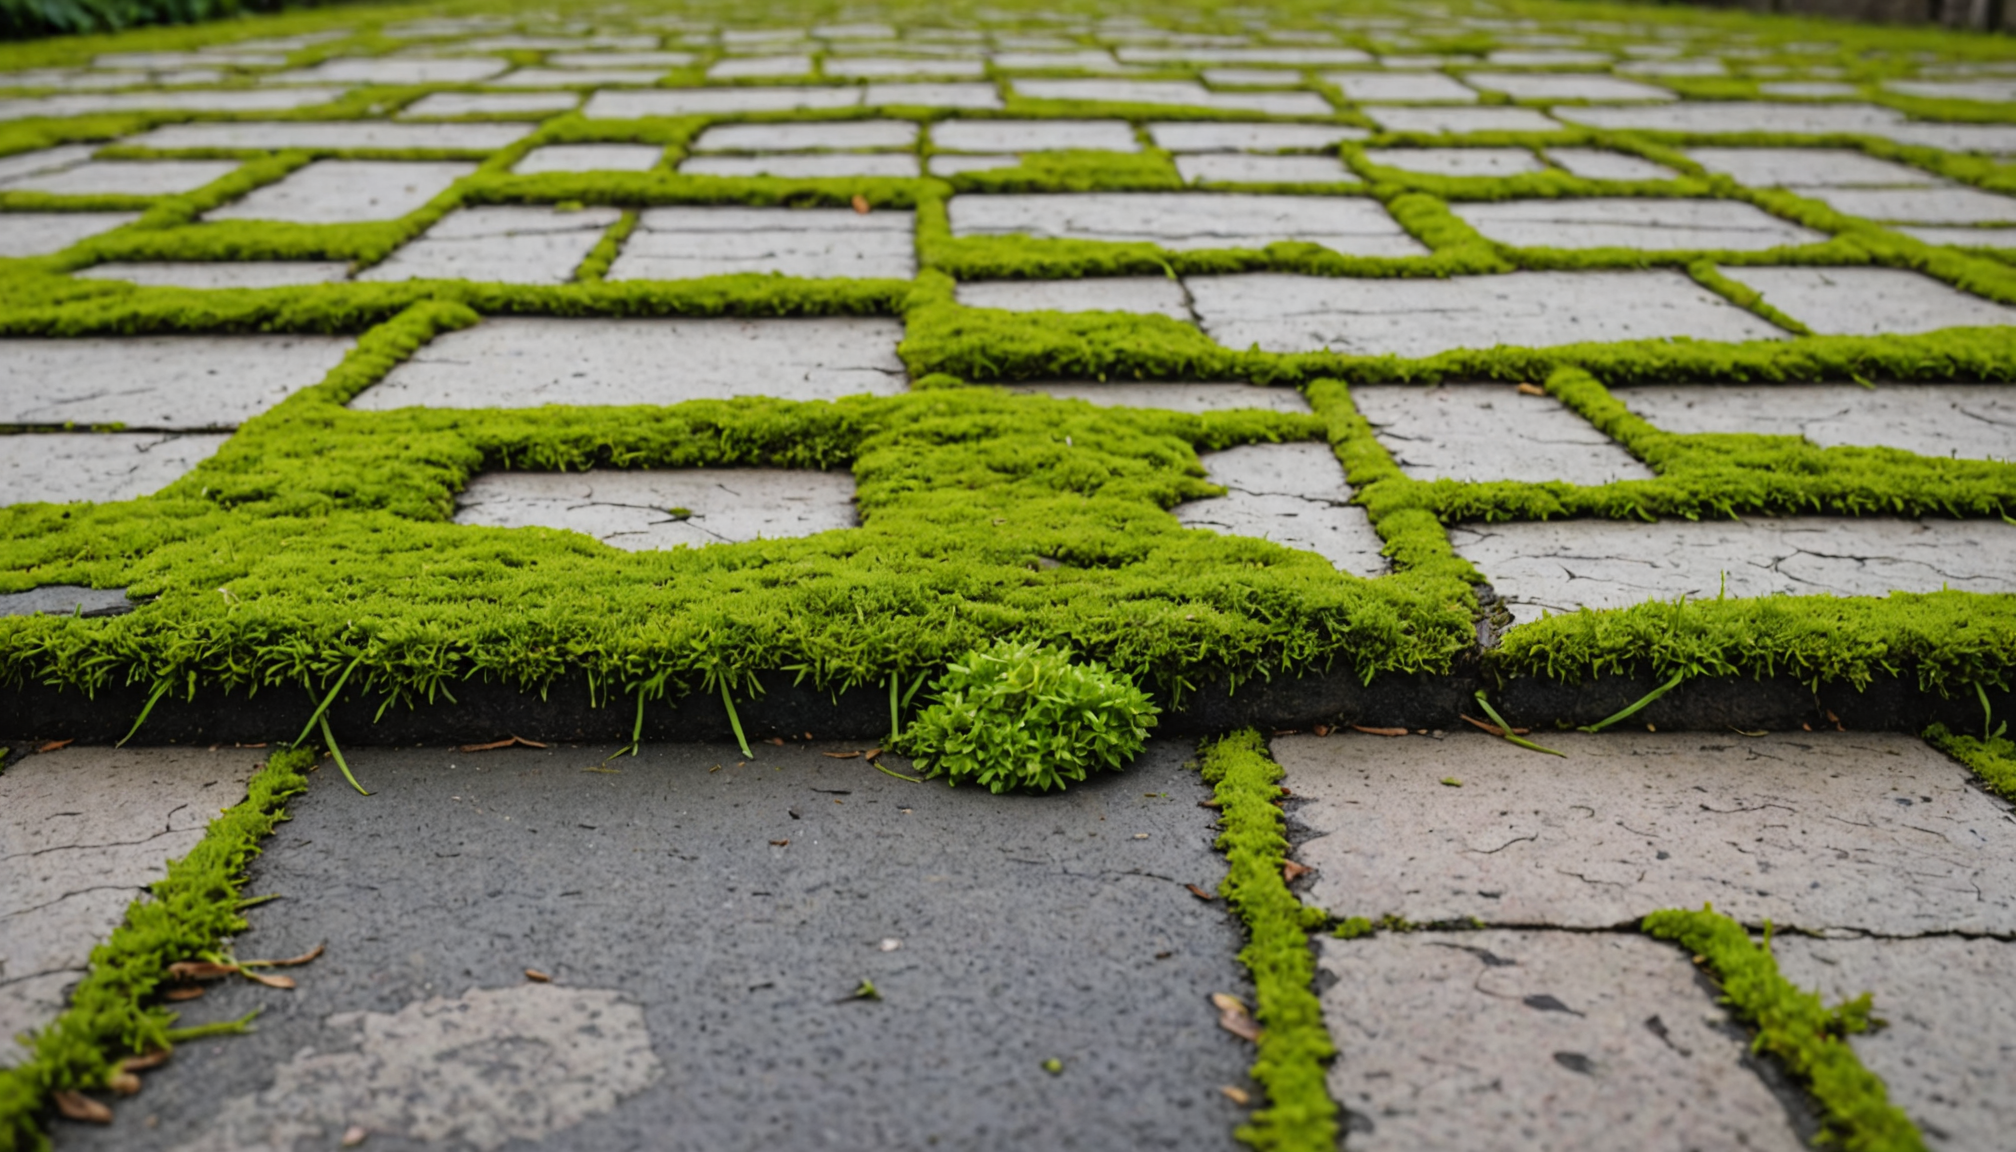
When you set out to inspect your driveway, the first step is to assess the surface conditions. This process involves closely examining the surface for any irregularities, uneven spots, or visible damage that could affect both the aesthetic and functionality of your driveway. Analyzing the surface conditions provides a comprehensive overview of potential areas requiring attention, allowing homeowners to prioritize repairs based on urgency and budget.
Assessing the surface condition is crucial because it helps identify underlying issues such as subbase erosion, which may not be immediately apparent. Paying attention to subtle signs like discoloration, which might indicate water retention, or the presence of moss, can pinpoint trouble spots that might require remediation. By acting early on these signs, you can avoid more extensive repairs down the line, leading to significant budget savings.
Surface condition inspection should include:
- Checking for unevenness that can lead to puddle formation.
- Identifying any areas where the surface texture has changed, which could indicate wear or tear.
- Locating stains that might suggest oil leaks or other automotive fluid discharges.
- Observing any fading color that could be a result of prolonged UV exposure.
It is helpful to compare different areas of your driveway to determine the extent of damage and prioritize repairs. The table below shows some key indicators to look for and suggested corrective actions:
| Indicator | Possible Causes | Action Required |
| Uneven Surface | Soil erosion, poor installation | Relevel and compact subbase |
| Discoloration | Water retention, algae growth | Improve drainage, clean surface |
| Oil Stains | Vehicle leaks | Clean with detergent, check for vehicle maintenance needs |
| Color Fading | UV exposure | Apply UV-protective sealant |
Taking the time to thoroughly assess your driveway’s surface conditions can lead to substantial long-term benefits, including increased longevity and enhanced curb appeal. By systematically inspecting these elements, a proactive maintenance strategy can be developed, ensuring that your driveway remains both functional and visually pleasing for years to come.
check for cracks and potholes
 As you move to the next step in inspecting your driveway, focus on identifying and addressing any cracks and potholes. These common issues can be more than just eyesores; they may also lead to further deterioration if left unchecked. Here’s how you can effectively inspect and deal with them:
1. Visual Inspection:
– Walk along the entire length of your driveway, paying close attention to any discernible lines or cracks.
– Look for areas where the surface has depressions, indicating the potential formation or presence of potholes.
– Mark any troublesome spots using chalk or a small flag so you can easily revisit them for repairs.
2. Determine the Depth and Width:
– Use a tape measure or ruler to assess the width and depth of each crack and pothole.
– Measure and record these dimensions to prioritize repairs—wider or deeper problems usually require more immediate attention.
3. Evaluate the Causes:
– Understand that cracks may result from a variety of factors, including temperature fluctuations, heavy loads, or poor initial construction.
– Potholes often develop due to the erosion of the substrate beneath your driveway’s surface, commonly exacerbated by water infiltration.
– Identifying the cause helps in addressing the root problem to prevent future occurrences.
4. Plan the Repair Process:
– For small cracks, consider using crack filler designed for your driveway material, such as asphalt or concrete.
– For deeper issues, particularly potholes, you might need to employ a cold patch repair material, which can be compacted to restore a smooth surface.
– Ensure you have all necessary materials and tools available before starting, such as a trowel, patching compound, and compacting equipment.
5. Execute Repairs:
– Clean any debris, dirt, or loose material from the cracks and potholes using a broom or high-pressure water stream.
– For cracks, apply the filler smoothly and evenly, ensuring it’s level with the surrounding driveway surface. For potholes, fill the hole gradually, compacting each layer thoroughly.
– Follow up by sealing the repaired areas, which helps prevent moisture infiltration and gives the surface a uniform look.
6. Monitor and Maintain:
– After repairs, continue to keep an eye on these repaired spots and the overall state of the driveway.
– Consider re-inspecting periodically, particularly before and after winter if you live in an area subjected to freezing temperatures, as freeze-thaw cycles can exacerbate damage.
– Regular maintenance can reduce the need for extensive repairs, saving both time and budget in the long term.
By taking these steps to inspect for and address cracks and potholes, you not only enhance the appearance of your driveway but also extend its lifespan, thus maximizing your investment and maintaining the curb appeal of your property.
examine drainage effectiveness
An effective driveway drainage system is essential for maintaining its structural integrity and prolonging its lifespan. Proper drainage helps prevent excessive water accumulation, which, if left unchecked, can lead to significant problems such as soil erosion, driveway cracking, and pothole formation. To ensure your driveway is equipped to handle rainfall and prevent water damage, follow these critical steps:
Begin by observing the natural flow of water across the surface. During a rainstorm, notice how water moves on your driveway—where it pools, how quickly it drains, and whether it seeps into unwanted areas like the foundation of your home. These observations reveal underlying drainage issues that need attention. If water tends to pool in particular spots, it may indicate insufficient grading, requiring adjustments to channel water away from the surface effectively.
Next, inspect the existing drainage systems around your driveway, such as gutters and downspouts. Ensure they are firmly attached, clear of debris, and directing water appropriately away from your property. It’s crucial that downspouts extend far enough away from the driveway to prevent erosion along its edges or underneath its surface. If your driveway lacks gutters, consider installing them to manage water flow better, particularly if your roof directs additional rainfall onto the driveway.
Another aspect to consider is using permeable materials for your driveway. Permeable paving solutions allow water to seep through the surface into the ground, promoting natural filtration and reducing surface runoff. Opting for such materials during your next maintenance project might incur an upfront cost but can lead to significant energy savings and reduced repair expenses in the long run by mitigating water damage.
Additionally, evaluate the surrounding landscaping and its impact on drainage. Trim back overgrown vegetation that might trap water or block flow. With proper planning, landscape changes can enhance drainage effectiveness, guiding water away from vulnerable areas. Simple measures, like creating gentle slopes in lawns adjacent to the driveway, can also aid in redirecting water flow.
Finally, after making any enhancements, be vigilant in your routine inspection. Frequent monitoring is vital to ensure everything functions correctly, especially after adverse weather conditions. Regularly checking for water marks, soil erosion, or new pooling spots will enable you to react quickly before minor issues escalate into significant repairs, ultimately aligning with your maintenance budget and preserving your investment in the driveway.
By thoroughly examining and optimizing your driveway’s drainage effectiveness, you can significantly reduce the risk of water-induced damages, promoting both the longevity and aesthetic of your driveway while safeguarding the structural integrity of your entire property.
evaluate edge stability
When inspecting your driveway, evaluating the stability of its edges is an important yet often overlooked task. The edges of a driveway play a critical role in maintaining its structural integrity, preventing both immediate and long-term damage. Over time, without proper attention, the edges can deteriorate due to various environmental factors or improper installation.
First, conduct a detailed visual assessment of the entire perimeter of your driveway. Pay close attention to any indications of crumbling or fragmenting along the edges. This may manifest as slight shearing, chips, or broken pieces. Identifying these early signs of wear can help you take preventive measures before the damage extends to the main body of the driveway.
Another potential issue is soil erosion around the edges. Check for any visible signs of erosion, such as exposed aggregate or soil in the vicinity, which might suggest that water runoff is gradually undermining the support of your driveway. If you notice such signs, consider correcting the grading around your driveway or enhancing your drainage system to guide water away efficiently, thereby providing stability.
Inspect any boundary or transitions where the driveway meets other structures, such as walkways or lawns. Often, shifting or mismatched settling between these areas can lead to instability. If you detect gaps between the driveway and neighboring surfaces, it might be a signal that your edges are compromising. Filling these gaps with an appropriate sealant can help maintain a seamless transition and prevent water from seeping beneath the driveway, which may cause further erosion.
The use of edge restraints or curbing can also augment the strength of your driveway’s borders. These elements help maintain cohesive structural support and mitigate risks associated with spreading. If your driveway lacks curbing or edge supports, consider incorporating these features during your next maintenance or upgrade project. Yes, there might be an upfront cost involved, but investing in such features can lead to substantial energy savings by deferring more extensive repairs.
Keep an eye on vegetative growth near the edges of your driveway as well. Over time, roots from trees or shrubs can exert pressure and slowly uplift sections of the driveway, leading to cracks and instability. If you spot roots creeping too close, it might be necessary to trim them back or even consider removing troublesome plants to ensure the longevity of your driveway.
As you proceed with these evaluations, remain mindful of your maintenance budget. Regular monitoring and minor repairs done in a timely manner can prevent the need for more significant, cost-intensive repairs. By addressing edge stability, you’re effectively preserving the overall health of your driveway and extending its lifespan, demonstrating that meticulous, routine inspections play a vital role in maintaining your home’s curb appeal and asset value.
review sealant and coating integrity
When inspecting your driveway, it’s equally critical to review the integrity of any sealants or coatings that have been applied. These protective layers are essential in preserving your driveway against environmental elements, including water, UV rays, and chemicals, all of which can lead to deterioration over time. An intact sealant or coating acts as the first line of defense against these threats, ensuring the durability and aesthetic appeal of your driveway while simultaneously contributing to energy savings by minimizing the need for frequent, intensive repairs.
Begin by examining the entire surface for any visible signs of wear or degradation in the sealant. Look for areas where the coating appears to be faded, peeling, or detached from the driveway. Discoloration or chalky residue might indicate that the sealant is breaking down under the sun’s ultraviolet rays. These signs of wear suggest that it may be time for a fresh application, as an effective sealant is crucial for repelling water and preventing moisture penetration, leading to freeze-thaw cycling and subsequent cracking during colder months.
Next, check for areas where oil or chemical spills might have compromised the coating. Oils can penetrate the sealer, weakening its protective capabilities and leading to staining or softening of the driveway material beneath. If any such deposits are found, use a recommended cleaning solution to remove them and assess whether a resealing is necessary to restore full protection.
Also, pay attention to high-traffic areas, as they are often subject to more rapid sealant degradation. These sections might display uneven wear patterns where tires are frequently in contact with the driveway, causing accelerated breakdown. If you notice such localized wear, it may be beneficial to apply additional coats of sealant in these areas to reinforce the protection.
Evaluate the type of sealant initially used when considering repairs. There are various types—acrylic, epoxy, polyurethane—and each has specific properties suited for different environments and driveway materials. Selecting the right product during resealing, based on the specific needs of your driveway, ensures optimal performance in terms of adhesion, flexibility, and protection against elements.
Implementing a consistent inspection and maintenance schedule tailored to sealant and coating integrity solidifies your proactive approach to driveway care. By routinely observing and addressing any emerging issues, you maintain not only the functionality and appearance of your driveway but also ensure cost-effectiveness with respect to your maintenance budget. Engaging in this practice annually or biannually can greatly extend the lifespan of your driveway, ensuring a resilient and visually appealing surface that adds value to your property.
Concluding this inspection process emphasizes a comprehensive understanding of your driveway’s health. Whether dealing with surface conditions, structural stability, drainage efficiency, or the integrity of sealants, regular and thorough evaluations are key. They allow for timely interventions that prevent small issues from becoming costly repairs, contribute to the longevity of your investment, and enhance the overall curb appeal and value of your property. By adopting these methods, you create an enduring and sustainable space that continues to perform effectively in any weather while protecting your financial interests in the long run.