When embarking on the journey to soundproof your laundry room, the first critical step is selecting the right materials. This decision lays the foundation for effectively reducing the noise generated by your appliances while operating, making the selection of soundproof materials crucial to achieving a serene environment within your home.
Soundproof materials can be categorized into several types, each serving specific purposes. Foremost among these are materials designed to absorb sound, which prevent sound waves from bouncing around and amplifying within the space. Fiberglass and mineral wool are popular choices in this category, offering exceptional sound absorption properties and insulation. Both materials are commonly used in DIY projects because they are cost-effective and versatile. For those on a budget, fiberglass offers a great balance between price and performance, making it a staple in many soundproofing endeavors.
Another category consists of sound blockers that prevent sound from passing through walls, floors, and ceilings. Mass Loaded Vinyl (MLV) is a classic example of a sound blocker. This dense, flexible material can be easily installed without requiring major structural adjustments, making it perfect for those interested in a straightforward, DIY-friendly solution. While MLV can be moderately priced, its effectiveness in sound reduction makes it a worthwhile investment in your soundproofing toolkit.
The considerations also extend to flooring and roofing materials. Carpeting or thick rubber mats can significantly dampen sound transmission through the floor. When choosing roofing materials, consider using acoustic tiles that help to absorb and break up sound waves as they ascend. These choices not only improve the acoustic quality of your laundry room but can add aesthetic value as well, blending seamlessly with the existing décor.
| Material Type | Function | Cost Range | DIY Suitability |
| Fiberglass/ Mineral Wool | Sound absorption | Low to Medium | High |
| Mass Loaded Vinyl (MLV) | Sound blocking | Medium to High | Medium |
| Carpeting/ Rubber Mats | Floor soundproofing | Low to Medium | High |
| Acoustic Tiles | Ceiling soundproofing | Medium | Medium |
When selecting materials, consider these aspects in alignment with your soundproofing goals and budget. Achieving the desired soundproofing level in your laundry room is highly dependent on the thoughtful combination of materials selected, their effectiveness in sound absorption or blocking, and how well they align with your DIY capabilities and financial plan.
Installing door and window seals
When aiming to soundproof your laundry room, focusing on sealing doors and windows is key in preventing noise leaks. These are two of the most common ways sounds escape from confined spaces, thereby undermining your soundproofing efforts. Follow these steps to effectively seal your doors and windows:
- Select Appropriate Weatherstripping: Start by choosing the right type of weatherstripping material, which is essential in filling in the gaps around doors and windows. For doors, consider using a rubber or foam weather strip, as it provides effective sound blocking while being easy to apply. For windows, a peel-and-stick rubber weatherstrip is ideal and ensures a snug fit that can seal small cracks and prevent sound leakage.
- Measure and Cut the Weatherstripping: Use a measuring tape to determine the dimensions of the edges you plan to seal. Cut the weatherstripping to the appropriate lengths, ensuring that you account for the full length and width of the doors and windows frames. Accuracy here will prevent any gaps that could allow noise to penetrate.
- Clean the Surfaces: Before applying the weatherstripping, make sure that the surfaces are clean and dry. Any dust, dirt, or moisture can compromise the adhesive quality, leading to ineffective sealing over time. Use a damp cloth to wipe down the frames and let them dry completely before proceeding.
- Apply the Weatherstripping: Begin at the top, pressing the weatherstrip firmly onto the frame and moving down along the sides. Ensure that the adhesive bonds adequately to the surface, providing a secure seal. Take your time to avoid any bubbles or misplacements, which could affect performance.
- Check and Adjust Door Sweeps: Installing a door sweep can significantly reduce noise transmission from underneath doors. Attach the sweep to the bottom of the door, ensuring that it lightly grazes the floor when closed. Adjustable door sweeps can be particularly useful to get the perfect fit and optimum soundproofing results. Use screws for securing the sweep to maintain a consistent seal over time, even with frequent door usage.
- Seal Window Gaps with Acoustic Caulk: For any remaining gaps around window frames or potential air leaks, acoustic caulk can be used. This specially formulated sealant is flexible and non-hardening, making it ideal for noise reduction. Apply a continuous bead of caulk in areas that require additional sealing beyond what the weatherstripping can offer.
- Test the Seal: Once the weatherstripping and additional sealing elements have been applied, conduct a sound test. Turn on your laundry appliances and listen for any noise escaping through the doors and windows. If necessary, make adjustments by adding extra sealing or replacing compromised weatherstripping, ensuring that the soundproofing meets your expectations.
Sealing doors and windows not only contributes significantly to isolating noise within your laundry room but also enhances energy efficiency by improving insulation. This can be a budget-friendly and straightforward DIY project, yielding both soundproofing and economic benefits. Properly sealing door and window frames enhances the overall effectiveness of your soundproof setup, allowing your home to maintain serenity while your appliances do their work.
Using acoustic panels and insulation
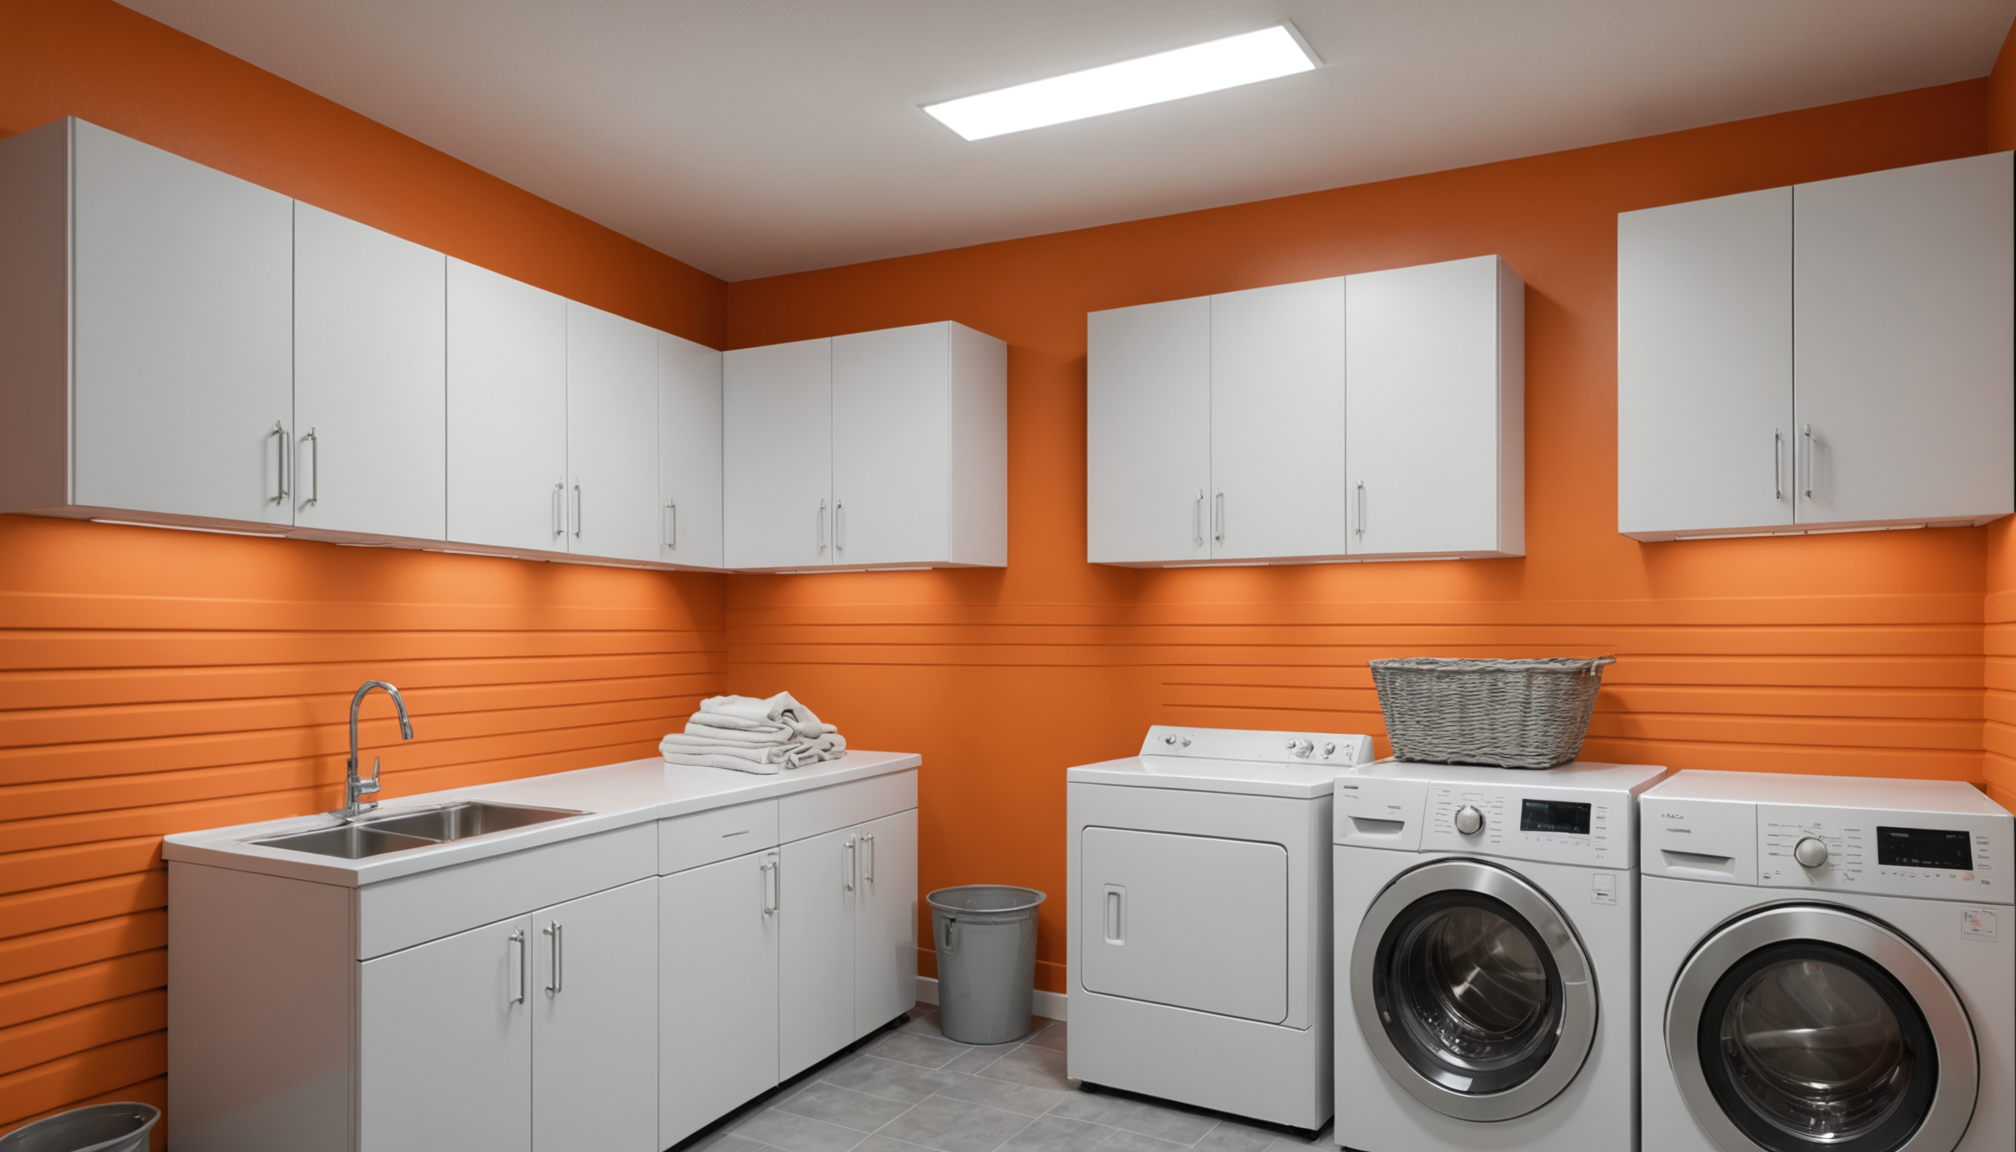
To further enhance the soundproofing of your laundry room, incorporating acoustic panels and insulation is both effective and accessible, even for a DIY enthusiast on a budget. These elements are pivotal in tackling the echo and reverberation often experienced in such spaces due to the hard surfaces that reflect sound waves. By strategically placing these components, you can drastically reduce noise levels and improve the overall acoustics of the room.
Acoustic panels, typically made from materials like dense foam or fabric-covered fiberglass, act as sound absorbers. When installed on walls, these panels capture and dissipate sound energy, preventing it from bouncing around the room. This not only reduces the noise levels within the laundry room but also lessens the amount of sound that escapes into other areas of your home. The effectiveness of acoustic panels largely depends on their placement. For optimal results, consider arranging them in spots where sound reflections are most prominent, such as directly across from noisy appliances or on parallel surfaces.
When selecting acoustic panels, you have various options to fit different aesthetic preferences and functional needs. Panels can be customized in various colors and patterns, allowing them to blend seamlessly with your existing décor or create a visual statement. Moreover, they are often lightweight and straightforward to install, making them a manageable DIY project.
On the insulation front, it’s paramount to ensure that the walls, especially those adjacent to living spaces, are diligently insulated. Insulation materials like fiberglass or mineral wool perform dual functions: sound absorption and thermal insulation. Installing these materials within the wall cavities is an effective method to curb unwanted noise. Should you be undergoing a renovation, this would be an opportune moment to enhance your existing insulation; however, if the walls are already finished, consider adding a layer of Mass Loaded Vinyl (MLV) or resilient channels to complement the acoustic setup.
Additionally, insulation should be considered for the ceiling and floor if your laundry room is located above or below living spaces. A layer of soundproof underlayment beneath flooring materials, such as carpeting or tiles with acoustic properties, can significantly reduce noise transmission between levels. Similarly, adding insulation above a drop ceiling or incorporating soundproof drywall can effectively mitigate the sound traveling to upper stories.
By meticulously selecting and installing acoustic panels and insulation, you can achieve a serene environment in your laundry room that not only enhances the functionality of the space but also contributes to a quieter home. This approach aligns seamlessly with budget-friendly soundproofing strategies while offering noticeable improvements in noise control. Whether you’re an avid DIY homeowner or enlisting professional help, these solutions offer an opportunity to elevate both the acoustic quality and comfort of your home.
Implementing floor and ceiling solutions
To effectively minimize noise transmission from your laundry room, addressing both the floor and ceiling is vital. A strategic approach to these areas adds an additional layer of sound isolation, significantly reducing the noise footprint of your appliances.
Starting with the floor, consider solutions that incorporate both soundproofing and comfort. One of the most budget-friendly and effective options is adding a layer of underlayment beneath the existing floor covering. This underlayment acts as a sound buffer, absorbing vibrations and reducing sound transfer, which is especially useful if your laundry room is on a higher floor. Materials such as cork or rubber underlayment offer excellent sound-dampening properties and are easy to install, making them a perfect DIY project for homeowners. Simply roll out the underlayment and secure it in place before laying down carpet, vinyl, or laminate flooring. This not only minimizes sound but also provides a cushioning effect, making the area more comfortable to stand on for prolonged periods.
In addition to underlayment, if your flooring allows, consider installing thick carpeting or large area rugs. These add an additional layer of noise absorption and help dampen any ambient noise within the room. Opt for rugs made from dense materials, which are better at trapping sound waves and preventing them from spreading.
Turning to the ceiling, consider a two-pronged approach that incorporates both insulation and soundproofing tiles. If you have access to the area above your ceiling, adding fiberglass or mineral wool insulation can dramatically decrease noise penetration. These materials trap sound within their dense fibers, stopping it from traveling upwards into other living spaces.
If modifying the space above the ceiling isn’t an option, ceiling tiles designed with acoustic properties can offer an immediate solution. These tiles are often composed of high-density materials that function to absorb and block sounds effectively. Their installation is straightforward and can often be achieved without professional assistance, providing a DIY-friendly path toward enhanced soundproofing. When paired with existing ceiling insulation, acoustic ceiling tiles deliver superior noise reduction and add a decorative touch to your laundry room.
Another option is the installation of a soundproof drywall, which is an “out of sight” but highly effective measure. This type of drywall contains damping compounds that absorb and isolate sounds. Although more involved than simply adding panels or tiles, the investment can significantly reduce noise levels entering and leaving the room, enhancing overall home tranquility.
Incorporating these floor and ceiling solutions provides a comprehensive soundproofing strategy for your laundry room. While some projects may require more time or investment, the resulting peace and quiet, along with potential energy savings from added insulation, offer long-term benefits that can enhance the comfort and efficiency of your home. Considering the noise reduction satisfaction achieved, investing in optimal floor and ceiling treatments is a sound decision for any budget-conscious homeowner looking to elevate their living environment.
Maintaining an effective soundproof setup
Preserving the efficacy of your soundproofing setup in the laundry room involves ongoing care and attention to detail. One of the primary strategies for maintaining a soundproof environment is to regularly inspect the integrity of the soundproof materials and seals over time. This ensures that wear and tear or accidental damage does not compromise the effectiveness of your setup. Start by routinely checking all installed weatherstripping around doors and windows. These elements are integral to preventing sound leakage and, if damaged or worn, should be replaced promptly to maintain their function.
Continue your assessment by periodically examining any acoustic panels, installing new ones as necessary. Over time, the panels may suffer from everyday wear or environmental factors that could reduce their sound absorption efficiency. If you notice any deterioration or displacement, adjust or replace them to ensure they continue to perform optimally. Similarly, inspect insulation materials that you have placed within walls or ceilings, looking out for any settling or gaps that might have developed and adjusting them as necessary.
Maintaining clean and unobstructed floors and ceilings will also contribute to effective soundproofing. Make sure that any area rugs are correctly positioned and check for any padding or underlay that may have shifted. It may also be helpful to vacuum or lightly clean soundproofing materials periodically to prevent dust buildup, which can affect their sound absorptive capabilities.
Moreover, if you have incorporated any movable elements like door sweeps, test their position and effectiveness regularly. They should maintain snug contact with the flooring without causing excessive wear that might open gaps.
Should your home undergo any renovations or changes, reassess the soundproofing requirements of your laundry room. New appliances or shifts in room layout call for reevaluation and adjustment of your soundproofing strategy. Being proactive in making necessary adjustments can help preserve a quiet environment as the dynamics of your home change.
Lastly, stay informed of emerging soundproofing technologies and materials. As techniques evolve, you may find more efficient or affordable solutions that better fit your budget and soundproofing goals. By remaining engaged and attentive to the ongoing condition and performance of your soundproofing setup, you ensure a durable noise-reduction environment that continues to contribute to the comfort and functionality of your home.
Conclusion:
Incorporating soundproofing measures in your laundry room transforms a space prone to noise into a hub of tranquility within your home. By diligently selecting appropriate materials, sealing doors and windows, employing acoustic solutions, and addressing both floor and ceiling noise transmission, you significantly reduce annoying disruptions. Committing to regular maintenance and staying informed of new developments further enhances the effectiveness of your setup. While some steps may require investment and elbow grease, the peace and quiet achieved provide incomparable comfort and well-being in the long run. Whether a benchtop DIY enthusiast or a homeowner willing to invest in professional help, soundproofing your laundry room is a rewarding endeavor that elevates your living environment.